

By: Hoaseng Thao

Ever wanted to make a camouflage pattern but don’t know how? Well this article is for you, because this article will go through the process of how to make different camouflage patterns using the free editing website, ‘Photopea’.
Before we get into the tutorial, I must explain what is needed for a camouflage pattern to work as a functional camouflage pattern; here are the two rules I’ve made to explain this:
- The pattern must be created for a specific (or varieties of) environment, i.e. Woodland, Desert, Tropical, or Arctic environments.
- Colors cannot be too bright or too saturated, military camouflage patterns are designed to deceive the eye, not entice them.
STARTING OFF WITH THE CLOUDS
STEP 1
Go to https://www.photopea.com/ and start off with a new project, usually I prefer using 2000 pixels for both height and width however you can change this if you want.

STEP 2
Go to your layers tab, which should be on the right side, and click on the sticky note symbol on the bottom to create a new layer. There should already be a layer when you start the project, named “Background”, and we’ll be using that layer for the background color of the camouflage by using the paint bucket too by pressing “g”.

STEP 3
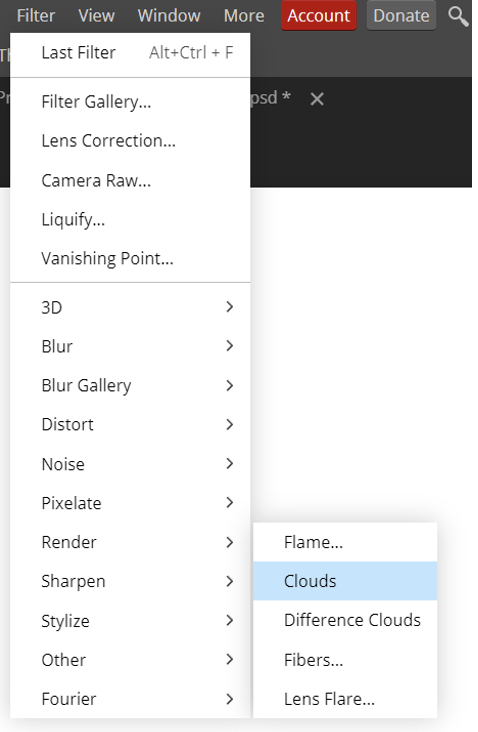
Select your new layer and go to the “Filters” tab at the top. There go to the “Render” tab and click the “Clouds”. Repeat this process again but instead of clicking “Clouds” you click on “Difference Clouds” twice.
IMPORTANT NOTE
This is the part where I’ll split this tutorial into three sections on how to create different types of camouflage patterns. The first section will go over how to make what I call, traditional camouflage patterns, which consists of round and blobby shapes.
The second section will go over how to make what’s called “Digital Camouflage” which uses more pixelated shapes than rounded blobby shapes, and examples of digital camouflage patterns are the Canadian CADPAT, the American UCP, and the Estonian ESTDCU.
The third and final section will go over how to make Flecktarn like camouflage patterns. For those who don’t know, Flecktarn is the camouflage pattern used by the German military and is distinct for using spots scattered across the pattern.
TRADITIONAL CAMOUFLAGE
STEP 1
Select the layer that has the clouds filter and go back to the filters tab then to the “Blur” tab. There you will select the “Gaussian Blur”. When clicked you’ll be greeted with a window asking how intense you want the blur to be, with the more blur resulting in a more rounded and blobby shape while less blur will result in a more erratic blob.
STEP 2
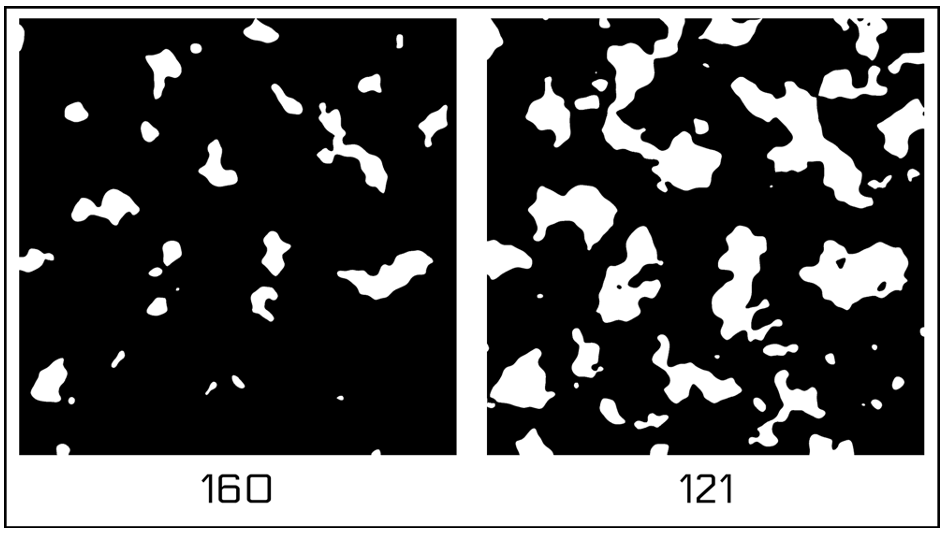
Now with the selected layer, you go to “Image”, “Adjustments”, and finally “Threshold”. Upon clicking “Threshold”, you can choose how intense the threshold would have on the layer, with the higher the intensity leading to less blobs and vice versa.
STEP 3
Selecting the layer you now go to “Select” then click on “Color Range”, where you’ll see a window pop up with the options to select specific colors or areas that are bright or dark, but depending on what you want for your pattern, you can select any of the options.

STEP 4
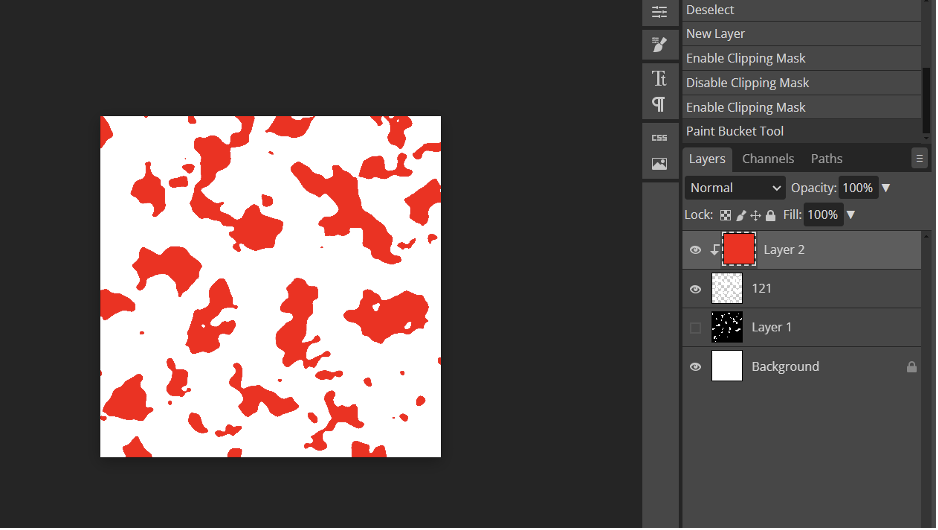
After selecting the color, you can now press the delete (or if you don’t have a delete button, you can go to the “Edit” then click on “Clear”) to remove the selected area. With this, you can now change the color using gradient map or adding a new layer and pressing alt click to enable clipping mask, which would allow you to paint over the layer.
STEP 5
Now repeat the previous steps, which should try to be in different sizes and should try to disrupt the other layers. Here are a few examples of camos that I’ve created while following the steps above.

DIGITAL CAMOUFLAGE
STEP 1
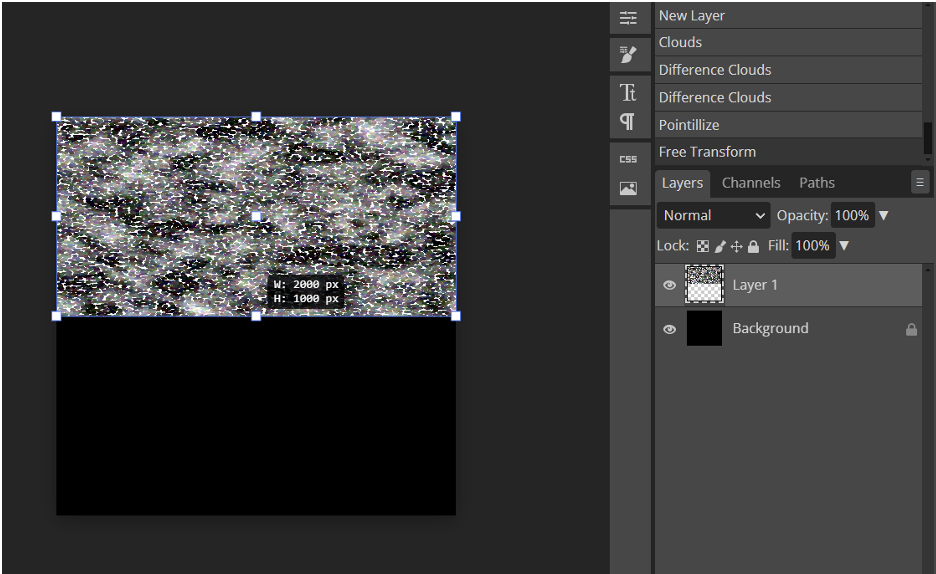
Select the layer, go to “Filter”, “Pixelate”, and then “Pointillize”. I usually use 25px when using pointillize but you can change this depending on what you want. From here, you press “alt+ctrl+T” to free transform the layer, then you can hold “shift” and drag the bottom of the layer till it snaps to the middle of the image.
STEP 2
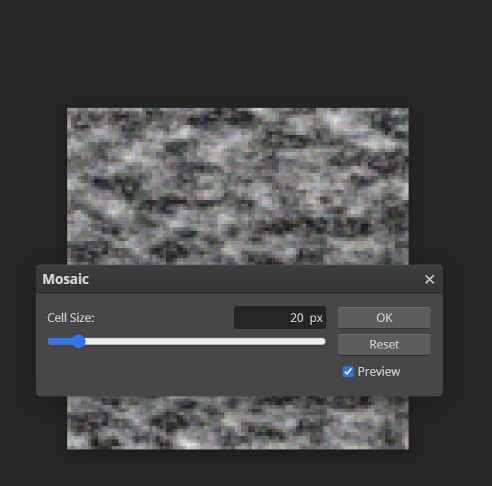
Duplicate the layer with “ctrl+J”, then move it to the bottom before merging with the original layer by selecting both layers and do “ctrl+E” to merge layers. Now you can do “Gaussian Blur” and go to “Filter”, “Pixelate”, and “Mosaic”. From here you can change the size of the pixels to your liking.
STEP 3
Now use the “Threshold Edit” to change how many white or black pixels would appear on the screen which you can delete by using the color range selection, and finally you can copy steps 4 and 5 from the traditional camouflage pattern section to create a digital camouflage pattern.

FLECKTARN CAMOUFLAGE
STEP 1
Select the layer, go to “Filter”, “Pixelate”, and then “Pointillize” and from here you can choose the size of the spots seen on Flecktarn camouflage patterns and its many variants. Now go apply “Gaussian Blur” to the layer, and I recommend that you keep the “Gaussian Blur” below 12px to avoid merging all the spots together.
STEP 2
Now repeat step 1 and color in the layers, and you now get yourself a Flecktarn style camouflage pattern.

CONCLUSION
There are many other ways to create different types of camouflage patterns but these three are the most common found throughout the world, and I hope that this tutorial helps you when it comes to designing your own camouflage patterns.
Here is a link to the website if you haven’t clicked on it before: https://www.photopea.com/
