Category Archives: Travel/Food

Duluth’s “Bentleyville” — A tour of lights

By: Ann McMullen

In 2001, Nathan Bentley began decorating his house in Esko, MN, for Christmas, making it more extravagant each year. This became quite an attraction in the small town, and drew enough people that it was able to move to Duluth’s Festival Park in 2009.

Since then, this display of Christmas lights has only grown. Hundreds of thousands of dollars are invested in new decorations each year.

Bentleyville’s total attendance reached 330,000 people in 2018, and has likely only increased since then. Still, it is exclusively a walking tour, so you’ll feel the cold Minnesota weather the whole time and get a true “winter wonderland” experience. If you’re lucky, it might even snow during your visit!

A tall cone lit to look like a Christmas tree, which must be at least a hundred feet tall, is Bentleyville’s most long-standing, iconic, and unchanged display. An “#OnlyinMN” sign stands at the base of it, making the tree a popular place to take fun, touristy photos.

Bentleyville remains free to visit, and even provides free cookies and hot chocolate as of last time I was there, but a $10 fee is required to use their parking lots. They also accept donations of non-perishable food and toys to give to people in need.

The attraction is open from 5-9pm on weeknights, and 5-10pm on weekends, and will close for the season on December 26th. If you can’t make it this year, Bentleyville generally opens about a week prior to Thanksgiving annually.

I do enjoy Bentleyville, and think it’s definitely worth a stop if you end up in Duluth over the holidays. That being said, I wouldn’t schedule a trip there for the sole reason of seeing the light show – but I’m sure some holiday enthusiasts might.

The official Bentleyville website can be found at:

Recipe: Gingerdoodle sandwich cookies

By: Julia Sikorski Roehsne

With the month of December comes the many winter holidays, and with the holidays comes baking—cakes, pies, breads, and cookies. Especially cookies.

Some of the most commonly consumed are sugar cookies, gingerbread, peanut butter blossoms, and jam thumbprint cookies. These are all well and good, but sometimes there might be a desire to try something new.

Therefore, I present a vegan, gluten-free twist on the classics: gingerbread snickerdoodle sandwich cookies. This recipe yields 24 cookies, or 12 sandwiches.

Gingerdoodle ingredients

  • –  3⁄4 cup (1 1⁄2 sticks) vegan butter
  • –  1⁄2 cup granulated sugar
  • –  1⁄2 cup brown sugar
  • –  1 tsp vanilla extract
  • –  1⁄4 cup molasses
  • –  1⁄4 cup applesauce
  • –  2 1⁄4 cups almond flour
  • –  1 tsp baking soda
  • –  2 tsp baking powder
  • –  2 tsp ground ginger
  • –  1 1⁄2 tsp cream of tartar
  • –  1 tsp cinnamon
  • –  1⁄2 tsp ground cloves
  • –  1⁄2 tsp salt

Gingerdoodle sugar coating ingredients

  • –  1⁄4 cup granulated sugar
  • –  1 tsp cinnamon

Buttercream frosting ingredients

  • –  1⁄2 cup (1 stick) vegan butter
  • –  2 cups powdered sugar
  • –  1⁄2 tsp vanilla extract
  • –  2 tbsp almond milk
  • –  1⁄2 tsp cinnamon

Start by making the dough for the gingerdoodle cookies. To begin, mix the butter, granulated sugar, and brown sugar together in a large mixing bowl until the ingredients are fully combined. The butter should be soft, either at room temperature or partially melted. You can use an electric mixer or stir the ingredients by hand.

Next, add the vanilla extract, molasses, and applesauce to the same mixing bowl. These should also be electrically or manually stirred until fully combined.

In a separate large mixing bowl, combine the dry ingredients—almond flour, baking soda, baking powder, ground ginger, cream of tartar, cinnamon, ground cloves, and salt.

Stir the dry flour mixture into the wet ingredients until fully combined. This is your gingerdoodle dough.

Cover the mixing bowl containing the dough tightly with plastic wrap or some other form of secure covering and place it in the refrigerator. The dough will need to chill for at least 30 minutes, so in the meantime, prepare the sugar coating for the cookies.

Mix together the granulated sugar and cinnamon in a small mixing bowl. Stir the two until they’re combined. Depending on exactly how much dough you have, or how many cookies you plan to bake, the amounts of sugar and cinnamon can be adjusted.

As you prepare the sugar coating, preheat the oven to 350°F. As well, line a large baking sheet (or sheets) with parchment paper, making sure that there isn’t excess paper hanging over the edges.

After the 30 minutes have passed, remove the dough from the fridge. Shape it into balls of 1 to 2 tbsp, or however large you would like the cookies to be; be aware that they can spread a great deal when baked.

Roll each dough ball thoroughly in the sugar coating mixture before placing them on the baking sheet a minimum of 2 inches apart.

When the oven is preheated, place the baking sheet with dough balls in. Bake for 10 to 14 minutes or until the cookies are fully cooked. I would advise checking on them several minutes before you think they will be done.

While the cookies bake, or when you have a spare moment, prepare the buttercream frosting. Soften the butter without melting it completely and add it to a large mixing bowl. Using an electric mixer, slowly beat the butter on low until it’s fluffy.

Add in roughly half of the powdered sugar and continue mixing on low until combined. Add in the vanilla extract, almond milk, and cinnamon, followed by the remaining half of the powdered sugar. Continue mixing on low until all the ingredients are combined. You can add additional small amounts of almond milk or powdered sugar until the frosting reaches your preferred consistency.

Remove the cookies from the oven when they have finished baking. You’ll want to allow them to cool completely on the sheet before handling to avoid breaking them.

Image taken from: Image taken from: https://12tomatoes.com/gingerdoodle-sandwich-cookies/

Once the cookies have cooled, spread the buttercream frosting on half of them at your desired level of thickness. Place the remaining unfrosted cookies on top of the frosted ones to form sandwiches. An example image is shown to the side.

Though best enjoyed fresh, these gingerdoodle sandwiches can be stored in an airtight container in the fridge for 1 to 2 weeks. If there is leftover dough or frosting, both can be stored in the freezer for about 3 months.

Happy baking! Recipe adapted from:

My thoughts on this holiday dinner roll recipe

By: Alexa Ramirez

It is without a doubt people will enjoy a variety of foods this holiday season, each with their own delicious main courses and side dishes. This leaves many people, including myself, looking for the perfect rolls to accompany those meals. After extensive research, I found a recipe for rolls that looked absolutely delicious and relatively easy to make. These rolls were made for a Thanksgiving dinner, but are very versatile, and would work well with any other holiday, or non holiday, meal.

The recipe I found is from the Kirbie’s Cravings webiste, and my inspiration was from an instagram cooking page (their handle is: @kayzukhs).

The recipe calls for:

  • 2 1⁄2 cups of bread flour
  • 1⁄2 tsp of salt
  • 11 tsp of sugar(3tbsp+2tsp)
  • 1 large egg
  • 1⁄2 cup low fat/fat free milk
  • 120 grams of tangzhong*
  • 3 tbsp of unsalted butter
  • 2 tsp of instant yeast

*The tangzhong method
The tangzhong method is an Asian method of bread preservation that is intended for many different types of bread, all for them to be kept fresh and soft for longer periods. It is made with a flour and water mixture that is prepared several hours, to a day before, using bread flour and water and then mixed into the dough with the other wet ingredients. This tangzhong needs to sit for several hours, to a day, before adding it to the bread and for it, you will need:

  • 1⁄3 cup of bread flour
  • 1 cup of water

After getting all of my ingredients, I started to make the tangzhong. It was really simple; I mixed the bread flour in water and heated it over medium heat until it thickened, then placed it in a medium bowl and covered it in Saran Wrap before putting it in the fridge to sit. After preparing the tangzhong, I preheated the oven to 330 degrees Fahrenheit, and mixed the dry ingredients and then the wet ones before adding in the tangzhong.

After that, I kneaded it all together until it was no longer sticky, and had a thick but stretchy consistency, which is what the recipe said to aim for.

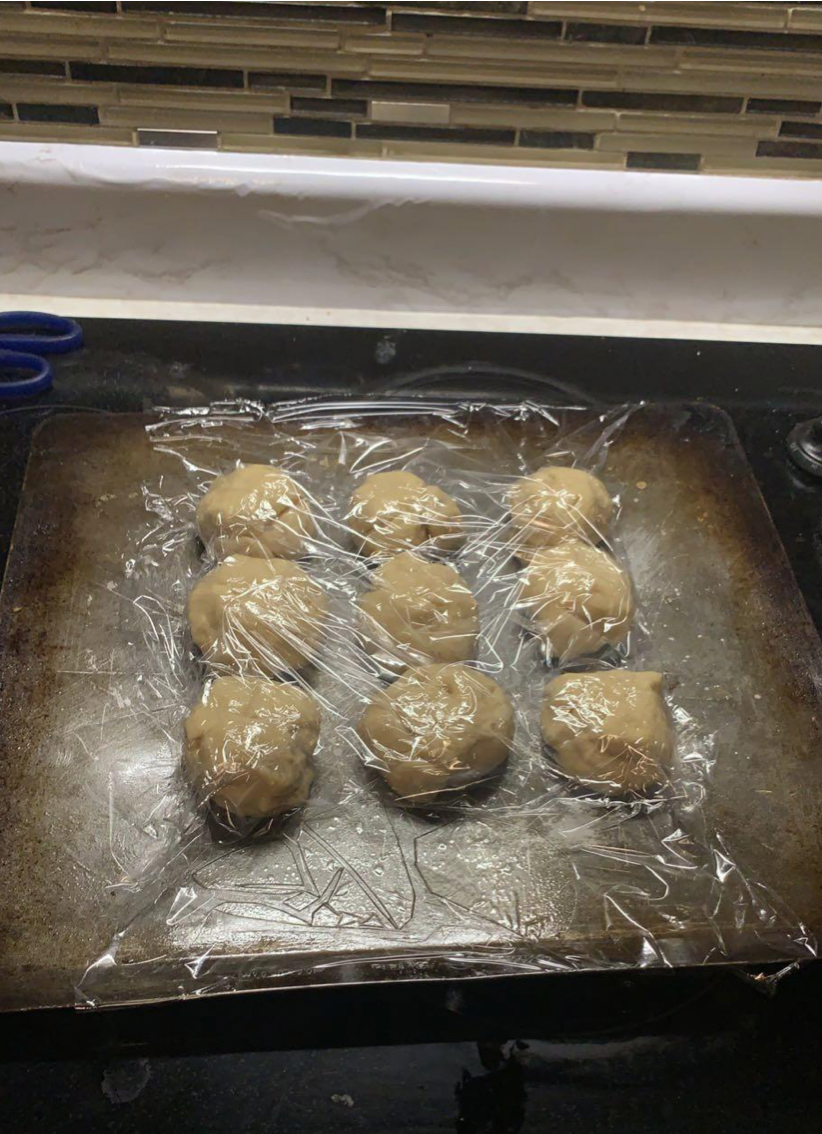
I then rolled it out into nine separate rolls and let it sit for two 40-60 minute waiting periods. This part of the process was the worst for me because it left me so much time without any baking to do.

Once the waiting was done, I was able to cover an 8×8 square pan with parchment paper and take the rolls out of the bowl and into the pan. I then covered the rolls with one egg, as instructed, and decided to add some basil to the top for my personal touch.

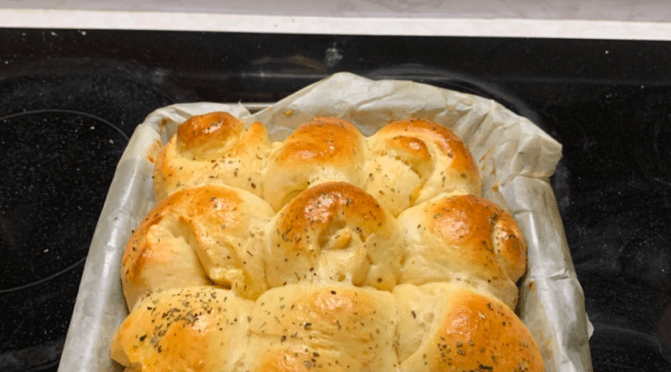
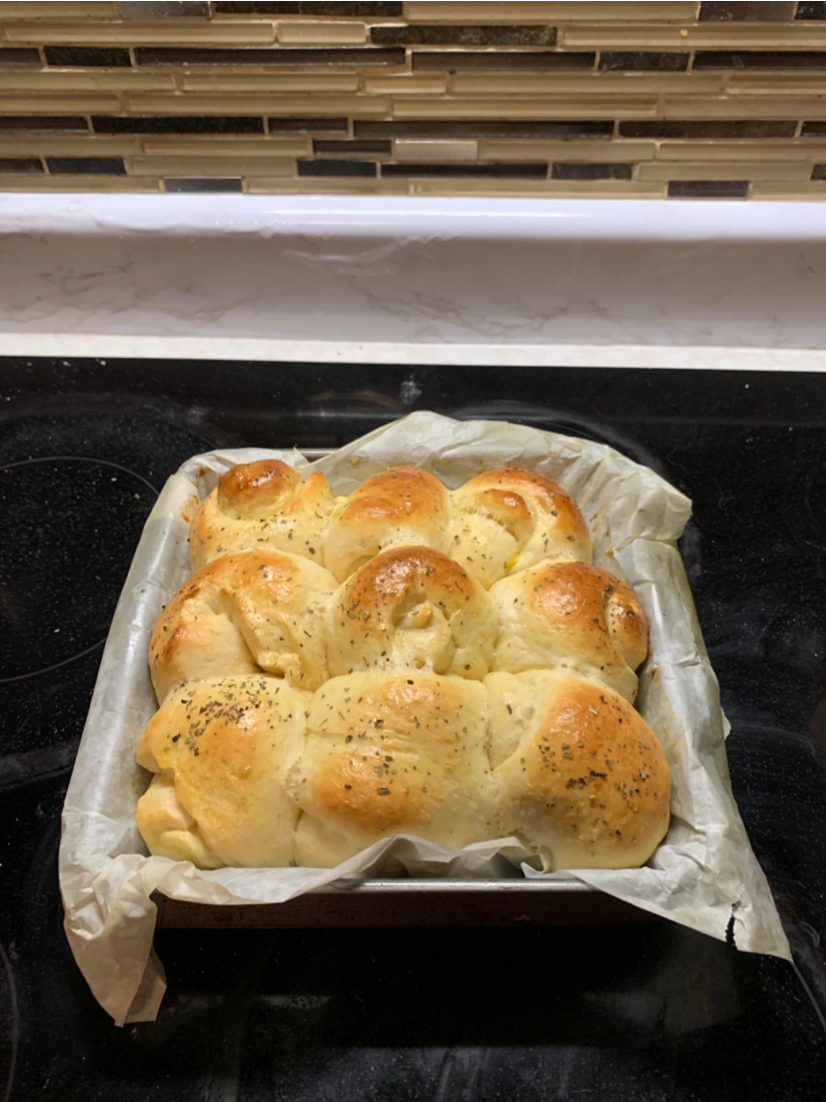
I then baked them for 30 minutes as suggested on the website and finally finished with delicious-looking rolls.

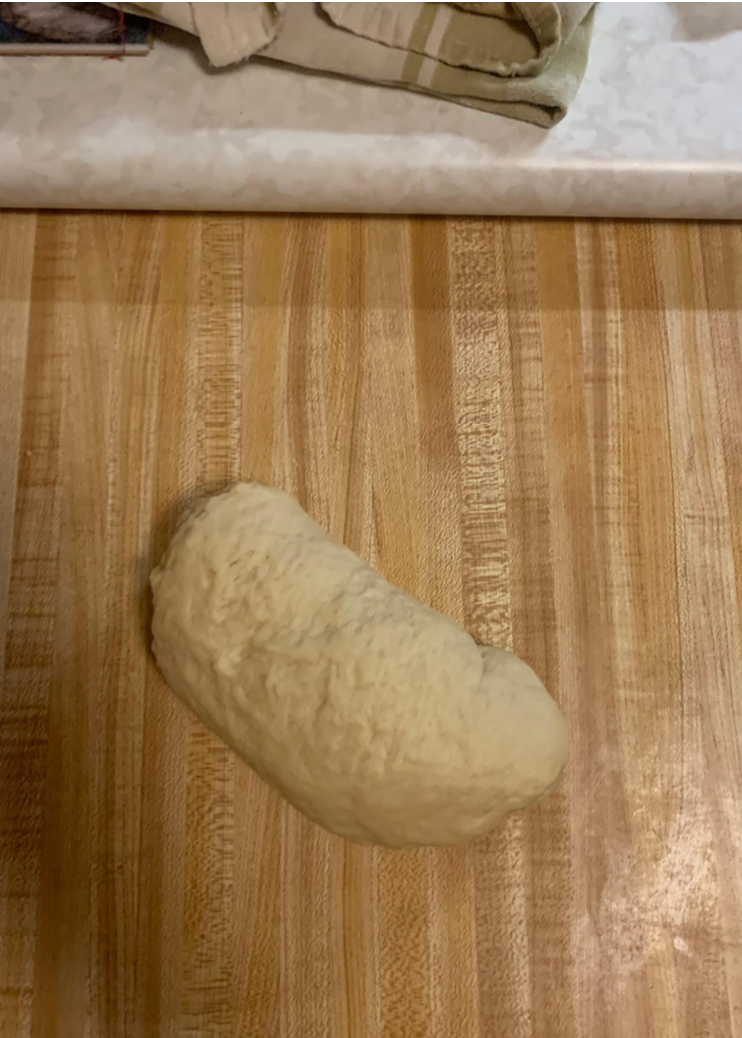
The dough before rolling and prepping
Rolled, waiting to bake!
Dinner Rolls fresh out of the oven

I was so excited to try them at dinner the next day, and they exceeded my expectations! Considering this recipe was my first time making bread from scratch, it was a challenge but left me with a delicious result. The bread turned out fantastic, it rose nicely creating fluffy, tasty rolls.

They paired nicely with the food I ate with my family and weren’t too filling, which is often my problem with dinner rolls. They had a rich flavor that was delicious and savory, versus the overdone, over-sweetened flavor that is common in rolls, and it paired perfectly with our dinner of turkey, potatoes, and veggies.

Another thing I enjoyed about this recipe was that my family hadn’t heard of this baking technique before, so it was interesting to learn about it and be able to share my knowledge with others who enjoyed baking. The recipe also called for ingredients that were easy to access, and could be found at most grocery stores, which was something I appreciated.

My recommendations after using this recipe, for anyone deciding to try it out, would be to set many hours aside when baking them because my biggest challenge with this recipe was how much time I spent waiting around on the bread before I could bake it. This is true of most bread, but is worth taking into account before baking so some time is set aside.

I also recommend branching this recipe out to many non-holiday meals! It makes for a great pairing to most savory or sweet foods and would be a great addition to any table. Overall, I rate this recipe, and my experience, a 4⁄5.

Blueberry Lemon Loaf recipe

By: Kaylen Fuentes

This recipe was adapted from: frugalmomeh.com and www.Iilluna.com

As it gets colder, and winter approaches, many people are looking for things to do with Thanksgiving, winter break and the new year. One thing I enjoy doing in my free time, and especially the colder months, is baking. So, here’s a recipe for blueberry lemon bread!

Tools you will need for the bread:

  • One big bowl
  • One medium bowl
  • A whisk or an electric mixer
  • A 9-inch loaf pan
  • Wax paper
  • Measuring glass

Ingredients you will need for the bread:

  • 1 cup of granulated sugar
  • 1 stick of salted butter (melted)
  • 2 eggs
  • 1 tablespoon vanilla extract
  • 1 cup of milk (of choice)
  • 2 cups of all purpose flour
  • 2 teaspoons of baking powder
  • 1 and a half cups of fresh blueberries
  • 2 teaspoons of lemon extract

Tools you will need for the frosting:

  • Two small bowls
  • Whisk or electric mixer

Ingredients you will need for the frosting: 

  • 3 tablespoons of melted butter
  • 1 and a half cups of powdered sugar
  • 3 tablespoons of lemon juice
  • 1 teaspoon of lemon extract

(Before starting this process, preheat your oven to 350 degrees).

First, in a medium bowl, cream together your melted butter and sugar using an electric mixer or a whisk. I prefer to use an electric mixer because it’s easier and much faster.  

Once you have the butter and sugar mixture add both eggs, vanilla extract and milk. Mix with the electric mixer once again, but be sure not to over mix because then the loaf will not come out as fluffy and the texture will be more tender.

Then, in a big bowl, mix together the flour and baking powder, this mixture you can mix with a whisk or a spoon since it doesn’t need too much mixing.

After both the wet and dry ingredients are mixed together in their separate bowls, slowly mix in the wet ingredients into the dry ingredients little by little. This part should be done with an electric mixer.

Once the dry and wet mixes are mixed together into the dough for the loaf, add a drop of lemon extract. A little bit goes a long way, so don’t add too much, especially since there will also be lemon juice and extract in the icing.

Next, prepare your pan. Add parchment paper to the bottom and around the side of the 9-inch loaf pan. Then cut off the excess paper sticking out around the top.

Then, before adding the blueberries, pour about ⅓ of the batter into the loaf pan. 

After preparing your pan, with the rest of the batter, fold in the blueberries gently, I try not to mush them because I find the bread better when they’re whole. I added about a cup, maybe a cup and half, but add as much or little as you’d like. Then pour the rest of the batter into the pan. The batter should be filled slightly under the top of the pan, because the loaf will rise.

Place the loaf pan in the oven and bake for 60 minutes. When the 60 minutes is up, the loaf will still be light in color so I baked it for about another 15 minutes for it to get golden.

While the loaf is baking, the icing can be started.

For the icing, take your small bowl and melt down 3 tablespoons of butter. 

Afterwards, add the butter, powdered sugar, lemon juice and lemon extract into a small bowl and mix with an electric mixer until smooth, and all the lumps are out.

Once the loaf is cool, ice the top of it with the icing and enjoy!

I wouldn’t hesitate to recommend this recipe. It was delicious and a perfect treat for Thanksgiving. Something I would like to do in the future is try this recipe with different fruits! I rate this tasty recipe 5/5 stars, and I will definitely be making it again.

Takis vs. Hot Cheetos

By: Manny Ochoa-Reeve

If you ask any students at the school you will most likely see that everyone likes some sort of spicy chips. The two main competitors are Hot Cheetos and Takis. Hot Cheetos are a puffy, crunchy, spicy chip. Takis are Mexican rolled tortilla chips with spicy lime powder. Personally, I love both.

If I had to pick between hot Cheetos and Takis I would definitely choose Hot Cheetos. I really like Hot Cheetos because of the texture you get through the crunchiness. I also really like the thick powder of Takis that packs a lot of flavor. For me, both are really good but Cheetos takes the win.

Something really cool about Cheetos is there’s lots of different flavor options. Around the world there are lots of different Cheetos flavors, for example: ketchup, pizza, extra hot, peanut, and a lot more. Takis have a couple flavor options like fajitas and guacamole but that’s about it. Cheetos have lots of different flavors so that it doesn’t get boring.

I asked two students here at Highland if they like Hot Cheetos or Takis better and they had different answers.

The first student said Hot Cheetos are better because Takis get bland and Hot Cheetos have more powder on them. T

he second student said they like Takis better because of the spicy, limey flavor.

If you ask everybody which one’s better, then you’ll see there will be different responses because the two chips are very different.

One of the biggest parts of evaluating these chips is the spice. I feel like Takis give you the spice right away, as soon as you take your first bite. Hot Cheetos are the opposite: they get spicier over time and as you eat them. This definitely depends on your spice tolerance.

Hot Cheetos and Takis both have a lot of similarities and differences. If you’re looking for something with more spice, and less texture, you should go for Takis. If you’re looking for something with more powder, and more texture, then Hot Cheetos are for you. Both taste really good, and I am always craving one or the other because of their differences and similarities.

Lake and Irving restaurant review

By: Gabe Kleiber

Lake and Irving is an American style restaurant located, unsurprisingly, on Lake Street and Irving Avenue. My family and I recently went there for dinner; here are some of my favorite things we got.

While it may be an “American” restaurant, it certainly doesn’t stay in those boundaries. The first dish I had was the poke nachos with wonton chips, ahi tuna, garlic aioli, and jalapenos for spice. The wontons were cooked nicely. They had plenty of crunch, and were light and airy. The aioli fits the other ingredients perfectly, and is the biggest source of flavor in the dish. Overall, it is a great Asian spin on a beloved Mexican Dish.

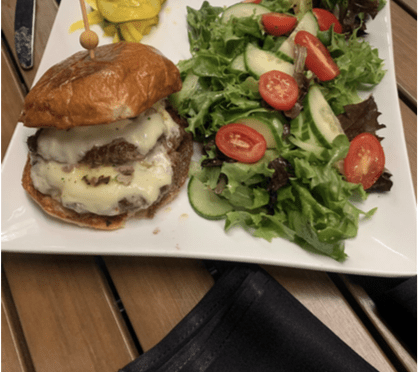
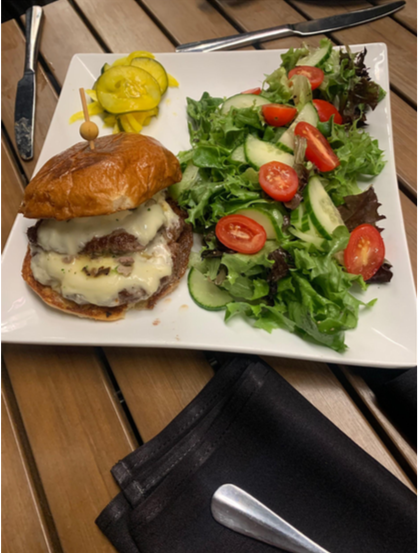
Next we had the Luxe burger, which has beef, cheese, black truffle, foie gras butter, aioli, and a brioche bun. While that may sound complicated, in actuality it is just a cheeseburger. It was amazingly juicy, extremely rich, and is one of my favorite burgers ever. Even though it had a simple concept, the ingredients and execution was complex and incredible. Probably my favorite dish I tried.

Another entree we got was the buttermilk chicken sandwich. It has bacon, chicken, cheese, aioli, and is served on grilled sourdough.
This wasn’t as good as the burger, but still quite good. By far the most interesting thing about it was the sriracha aioli, which I have never seen on a chicken sandwich before but worked quite well. Definitely an underrated way of adding spice and flavor to a sandwich.

Overall, I really enjoyed this dinner. There were some things I wouldn’t get again, and some that were merely good, but their best dishes more than made up for that, especially the burger and the poke nachos. This was the best meal I’ve had in weeks, and I would highly recommend you try it. 8.5/10

A Christmas dessert (that is made at my house during Christmas)

By: Jhari Boayla

Better than Anything Cake

This is one of my favorite desserts that my family makes on Christmas (not really for Christmas but it’s made on Christmas).

Ingredients:

-1 box of devil’s food cake mix (Betty Crockers to be specific) – mix it with the ingredient on the box (eggs, oil, water) 

-1 can of sweetened condensed milk 

-12 ounces of caramel ice cream topping 

-1 (8oz) container of Cool Whip

– 1 (8oz) bag of Heath Bars (optional, I don’t add it in sometimes) – crush them up

-chocolate ice cream sauce to drizzle over the top

Preheat the oven to 350 (grease the pan with nonstick spray, oil or butter). Get your cake mix ready and prepared.

The cake should take about 30 minutes but I would just keep checking it. (also depends on the pan size on how long it’s going to take) Use a toothpick and stick it in there if you think it’s done and if the toothpick comes out clean it’s done. 

Make your topping mixture while the cake is still cooking. Pour sweetened condensed milk and caramel sauce into a pan, or a sauce pan, and put it on low heat for ten minutes (you’re just doing this to make sure it’s warm and a little runny).

Once the cake is out the oven let it cool for a few minutes, maybe about 10 minutes. Poke the cake with the back of a wooden spoon all around in a line. Then pour your mixture over it.   

Let the cake cool and then spread the Cool Whip over the top. You can add the Heath bars on top if you want.

This recipe is adapted from the one found here (sorry for the not so school appropriate name, but it’s what I make):

The scam of the keto diet

By: Irene Cohen

The ketogenic diet, or keto for short, is a diet that focuses on extremely low carbohydrates with high fat content and protein in their foods. The idea of using this diet in order to lose weight is that the low carbohydrate intake and high fat intake forces the body to go into ketosis and burn fat instead of carbs. This, theoretically, results in burning body fat for energy and subsequently losing weight.

The ketogenic diet was developed in the 1920s by physicians from the Mayo Clinic. It was developed as a means to help treat epilepsy, as it mimics fasting metabolically. Fasting has been used as a treatment for epilepsy for over one thousand years, and this new diet provided a more accessible and healthy way to mimic fasting while avoiding most of the negative side effects. This diet was a very popular method of treating epilepsy until antiepileptic medication was developed. The mystery of why this diet works for treating epilepsy is still unsolved.

The keto diet requires you to eat 80-90% of your daily caloric intake from fat, with less than 100g of protein and 10-15 grams of carbohydrates. This forces your body to go into “starvation mode”, or ketosis, where instead of using glucose as an energy source, it breaks down fat stores into ketones in the absence of sugars.

What most people experience as fat loss due to the keto diet is usually just a calorie deficit, according to experts. Tracking your macronutrients and calories makes you more conscious of your food intake, which in turn makes someone more likely to lower their intakes as a reaction to this awareness.

This diet is also incredibly hard to follow, and many people end up not even going into ketosis, instead just having a high fat diet while still having enough carbs to break them down as usual.

The ketogenic diet can even have consequences for those who don’t have a professional nutritionist to aid them or those who do not need to follow this diet in order to treat neural diseases, like epilepsy. With such a large chunk of your diet being fat, your heart takes a hit. Such a high fat intake for so long can really affect your arteries in the long run. Not only that, but limiting your carbs to such a degree limits the nutrients you can consume. Eating just one small apple can meet your daily carb limit, and think of all the nutrients you get from fruit with a high, but healthy, sugar content.

The keto diet is another fad diet of medical studies being taken out of context for those who are desperate to lose weight. Most professional nutritionists say that at best, for the average person, keto might be moderately healthy. The possible consequences of damaging your metabolism and heart long term in order to shed a few pounds is not worth it. Eating a balanced diet of fruits, veggies, and whole grains is almost always the answer, most professionals say. Leave the ketogenic diet to those using it as a means of treatment for various diseases.

For more information, please visit:

Review of Haiku sushi restaurant

By: Alexa Ramirez & Kaylen Fuentez

For our review, we’ll be going to the Japanese bistro, Haiku. They serve a number of things such as sushi and hibachi, which is what we decided to order. We ordered their Kappa Maki rolls, Onion soup, as well as their Chicken Hibachi.

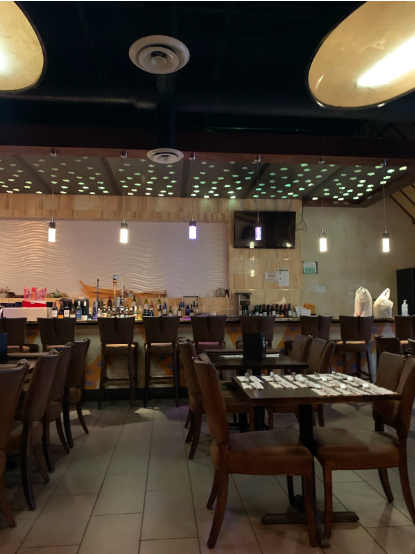
Inside the haiku restaurant

The first thing we noticed when we arrived was the ambiance; it was very calm, it wasn’t too busy, and was fairly quiet. They had slow, quiet music playing in the background and yellow dim lights throughout the restaurant.

We were checked on 2 or 3 times before our food was served, our glasses of water were filled frequently, and we were checked on while we were eating to make sure we had everything we needed.

It also didn’t take long for our food to come and we were able to get our checks quickly.

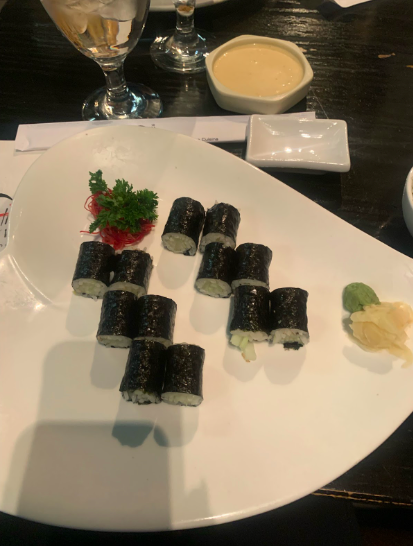
The order of the Kappa Maki

We ordered 3 dishes: an order of Sushi, Hibachi chicken, and we each got an order of Onion Soup.

The Sushi Roll we ordered was the Kappa Maki (cucumber) roll. It was priced at $5 for 6 rolls, a very reasonable price, and came with a few additive elements such as soy sauce, wasabi and ginger. The sushi rolls consisted of cucumber, seaweed and white rice wrapped on the inside. These rolls were delicious, and tasted very fresh. This order, aside from being super delicious for non vegetarians, being a delicious vegetarian option was definitely a bonus. We rate the cucumber roll a 4.5/5 stars and would definitely get it again.

Another thing we ordered was the onion soup, which was priced at $3. Aside from the actual soup, inside there were mushrooms and scallions. The soup was very savory, tasted really good, and was a nice warm appetizer, especially on a cold day. We’d rate the onion soup 4⁄5 stars as well.

The Hibachi Chicken order

The next order we received was the Hibachi Chicken Junior, which was the smaller version of the regular Hibachi Chicken. It cost $12.95, and was served with chicken, fried rice and veggies. The chicken was cooked to perfection and perfectly balanced savory and sweet sauce flavors. The fried rice was warm, savory, and overall my favorite part of the dish. The cooked zucchini paired well with these two, and really tied the dish together. All of the dish’s components were spectacular and deserves a 5/5.

Overall, the excellent service, kind waitresses, the welcoming ambiance, and delicious food they serve really push Haiku over the top. This restaurant has so many delicious dishes to choose from and is friendly to all people hoping to enjoy this amazing place. We wouldn’t hesitate to recommend this restaurant and rate it a 5/5.

Best places to visit in Minnesota in the fall

By: Addison Strack

There are many beautiful places to visit in Minnesota during the fall, and in this article I will be talking about a couple of the many places to visit.

The first destination I will be talking about is Minneopa State Park. This park is located in Mankato, Minnesota, and while it is beautiful year round, it is especially stunning in the fall.

The park contains a double waterfall that leads into a 39-foot drop over a gorgeous cliff. There are also 4.5 miles of trails within the park that are surrounded by trees that turn beautiful and vibrant colors during the fall. It is a great place to visit to take a hike and get some fresh air.

Another popular destination to visit in Minnesota during the fall is Taylors Falls. Taylors falls is a small town northeast of the Twin Cities. It is surrounded by bluffs and cliffs, and has many fun activities to offer.

You can head to Interstate Park in Taylors Falls to canoe, kayak, hike, and enjoy amazing views. The Taylors Falls Scenic Boat Tour is another great option to experience the beautiful scenery.

There are also many restaurants in Taylors Falls that serve delicious and high rated food. The Drive In serves classic American food like burgers, fries, shakes, and root beer floats. It is a perfect place to stop and enjoy a delicious meal.

If you’re looking for more beautiful views, you should check out Split Rock Lighthouse, in the small town of Two Harbors. The lighthouse is located on a rocky cliff over a lake. Behind the lighthouse is a forest that turns bright yellow, orange, and red in the fall to add to the beautiful landscape.

A fourth, and final place that I’m going to be talking about is Cuyuna, which is about 2 hours northwest of the Twin Cities. Cuyuna is a city that has a ton of fun activities to offer.

There are beautiful and charming cabins that were built in Cuyuna Cove that offer a great place to stay during your visit. These cabins are close to the Main Street in Crosby, which has many restaurants and shops.

Cuyuna Country State Recreation Area is also near Cuyuna Cove. Here you can swim, kayak, paddle board, canoe, snorkel, and more in the gorgeous clear lakes. You can also explore the beautiful mountain biking trails near Cuyuna Cove as well. Overall, it is a great place to visit to enjoy the outdoors, and explore the city.

Clearly, there are many beautiful places to visit in Minnesota in the fall, and I have only named a few. If you would like to read about more places to visit, feel free to check out the websites below.