Tag Archives: dessert

Shortbread cookie recipe and review

By: Nils Hilleson

Ingredients:

  • Two sticks of butter
  • 207 grams sugar
  • 1 teaspoon salt
  • 2 egg yolks
  • 320 grams flour
  • 1 egg white
  • Decorative sugar

Steps:

– Add butter, sugar and salt Into a stand mixer

– Beat at low speed until the ingredients are incorporated and smooth, around 3 minutes

– Add egg yolk and mix until combined

– Add all the flour into the bowl and mix at low speed, after roughly 30 seconds the dough will be in large clumps

– Remove dough from bowl and form into two 9 inch logs (doesn’t need to be exact)

– Wrap the logs separately in parchment paper and twist the ends closed

– Refrigerate for at least 30 minutes

– Heat oven to 350, line baking sheet with parchment paper

– Brush the surface of the logs with egg white and apply a lot of decorative sugar

– Slice the logs into 1/2 inch cookies

– Lay the cookies on the baking sheet and space them 1/2 inch apart

– Bake until the cookies are golden at the bottom edges, or 18 to 22 minutes, rotate the baking sheet halfway though baking

– Move cookies to a wire rack to cool completely

Cookies last for up to 3 days

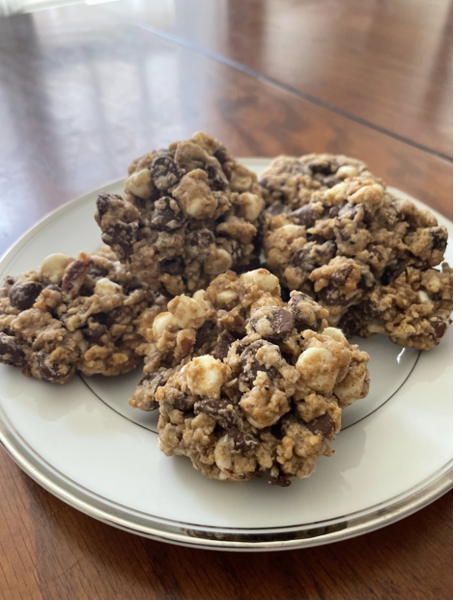
Making these cookies was pretty simple since it’s mostly butter and flour but they taste really good, they’re very buttery and sweet just over all delicious.

I made one set with red decorative sugar and one with green decorative sugar. Getting the decorative sprinkles on the dough was a little tedious. Cutting the dough into cookies was also a little tedious but also didn’t take the longest. I think the red ones may have come out a little undercooked since they were a little chewy but still delicious.

I was able to make a lot of cookies with this recipe. Making these cookies was pretty simple so I’d be interested in making more cookie some time. Once the cookies cooled down they were pretty crunchy and had a good texture for a cookie.

Me and my family all really like the cookies. I took these cookies to Thanksgiving and the rest of my family liked them quite a bit.

I might have to make these again sometime.

This is a rewritten New York Times recipe

Fudge recipe review

By: Norah Hoglund

In my opinion, fudge is one of the best treats to make during the holidays. Almost everyone loves fudge and it’s great to share with friends and family.

I reviewed a fudge recipe from allrecipes.com.

Review

The taste of this fudge is really great. I would compare it to really creamy milk chocolate with a touch of marshmallow flavor. It is perfectly sweet and has a great balance of flavors.

The texture of this fudge is perfect. It’s very smooth and creamy. It melts in your mouth; it’s soft enough that you can either bite it or lick it. It will even start to melt in your hand. It is not grainy, like fudge tends to be a lot of the time if you mess it up.

The process of making the fudge is really not very strenuous. All you really need is one pot to mix it in, and that’s the only thing you have to watch. The process is just melting a bunch of ingredients together in a pot, which makes your kitchen smell amazing, and pouring it into containers.

Overall, I think that this is a great fudge recipe. It will impress everyone that you share it with and everyone will want more (It’s very addicting). I rate this recipe a 10/10!

Ingredients

  • 1 ½ cups white sugar
  • 1 (7 ounce) jar marshmallow creme
  • 2/3 cup evaporated milk
  • 1/4 cup butter
  • 1/4 teaspoon salt
  • 2 cups milk chocolate chips
  • 1 cup semisweet chocolate chips
  • 1/2 cup chopped nuts
  • 1 teaspoon vanilla extract

Instructions

  1. Gather all ingredients. Line an 8-inch square pan with aluminum foil; set aside.
  1. Combine sugar, marshmallow cream, evaporated milk, butter, and salt together in a large saucepan over medium heat; bring to a full boil and cook for 5 minutes, stirring constantly.
  1. Remove from heat and add milk chocolate chips and semisweet chocolate chips; stir until chocolate is melted and mixture is smooth. Stir in nuts and vanilla.
  1. Pour into prepared pan; chill in refrigerator for 2 hours, or until firm.

Recipe review: Everything cookies (Family recipe)

By: Austin Bailey-Zimmerman

Ingredients:

  • 2 sticks butter
  • 1 cup brown sugar
  • 1/2 cup granulated sugar
  • 2 teaspoons vanilla
  • 2 eggs
  • 1 1/2 cups all purpose flour
  • 1 teaspoon baking soda
  • 1 teaspoon baking powder
  • 1 teaspoon salt
  • 3 cups QUICK oats
  • 1 bag chocolate chips
  • 1 bag white chocolate chips
  • 1 cup raisins
  • 1 cup chopped pecans or sunflower seeds

Instructions:

  1. Preheat the oven to 350ºF.
  2. Soften butter and in a medium mixing bowl, mix the butter, sugars, eggs, and vanilla until combined.
  3. In a separate bowl, mix all of the dry ingredients together.
  4. Combine both bowls into one.
  5. Fold in the chocolate chips, raisins, and pecans/sunflower seeds.
  6. Roll batter into golf ball sized balls and set on a baking sheet.
  7. Bake for 8-10 mins or until golden brown.
  8. Take out and let cool.
  9. Enjoy!

Review:

Have you ever tried to find the perfect cookie to bake? For me, this recipe is it. My family and I made this recipe and decided to name these cookies “everything cookies” because they have everything you could think of for a cookie.

I associate these cookies with my mother because I have always made these cookies with my mom and older brother ever since I was a little kid. Whenever we would make everything cookies we would always have extra so we would share them with our neighbors, my grandma, and I would bring a bag to school and share with my friends at lunch. I think these cookies really made me feel connected to the people around me, especially my mom.

I have a lot of great memories making these cookies with my family. When we put them in the oven, the whole house would fill with the sweet warm smell of cookies and it would stay for the rest of the day. When we finally took the cookies out, we would always put on a movie or show and sit down in the living room with a glass of cold milk and the cookies still warm. They were always perfectly gooey on the inside, but golden around the edge.

Sometimes the ingredients change. Sometimes we add new things or take away something, but they always taste nostalgic. These have always been my favorite dessert, and maybe they’ll be yours too! Try these out! Enjoy!

S’mores cookie bar review

By: Alice Rapacz

Ingredients:

  • ½ cup unsalted butter (room temperature)
  • ¾ cup packed brown sugar
  • 1 large egg (room temperature)
  • 1 teaspoon vanilla extract
  • 1 cup all-purpose flour
  • 1 cup graham cracker crumbs (around 8 full sheets)
  • ½ teaspoon baking powder
  • ¼ teaspoon salt
  • 1 cup semi-sweet chocolate chips
  • 1 heaping cup marshmallow creme (fluff)

Directions:

  1. Preheat oven to 350 degrees and line an 8-inch square baking pan or 9-inch square baking pan with parchment paper and set aside.
  2. In a large bowl using a hand mixer or a stand mixer fitted with the paddle attachment, cream together the butter and brown sugar on medium-high speed until fluffy (about 2 minutes).
  3. Beat in the egg and vanilla extract until combined. (It may look curdled but that is ok) scrape down the sides of the bowl with a spatula.
  4. In a separate medium bowl mix together the flour, graham cracker crumb, baking powder, and salt.
  5. Pour the dry ingredients into the wet and mix on medium speed until combined.
  6. In your prepared baking pan, spread ⅔ of the cookie dough onto the bottom of the pan. The dough will be sticky so do your best to evenly spread the dough in a thin layer.
  7. Use a spatula to spread the marshmallow creme on top of the dough. It is very sticky so just do your best to spread it in an even layer.
  8. Sprinkle the chocolate chips on top of the marshmallow creme in an even layer.
  9. Using the remaining cookie dough, mold it into flat pieces and layer on top of the chocolate chips. (There won’t be enough dough to cover the whole top in a single layer, some marshmallow and chocolate chips will be exposed.)
  10. Bake for 25-30 minutes or until the top is golden brown.
  11. Remove from the oven and place the pan on a wire rack to cool completely.
  12. Lift the bars out of the pan and cut into squares
  13. Cover and store the leftover bars at rooms for up to 1 week.
  14. Lastly, Enjoy!

Review:

The process of making the bars was very straightforward and the recipe was easy to follow. Once the dough was made the only part that was kind of hard was the assembly, only because of how sticky the dough and marshmallow creme was. I used my hands to spread out the dough, which made it easier to make sure it was spread evenly to each corner. Using a rubber spatula to spread out the marshmallow creme was a lot easier than anything else because it didn’t stick to it as much. I found that placing a few dollops of the creme on the dough before spreading it out made it much easier.

The hardest part of the whole process was waiting. The combination of the baking time and cooling time felt like forever and the smell of sweet graham cracker filled the air.

These cookie bars were so good! The inside of the cookie was soft from the marshmallow and the actual cookie itself, and the outside had the perfect amount of crunch. The sweetness from the marshmallow complemented the bitterness from the chocolate. I wasn’t sure how the marshmallow creme would bake, I didn’t know if it would get hard like other marshmallows when they are cooked for a while, but they were still soft.

These bars were so good, I made them a second time. They were the perfect way to end the night and my family loved them. I think that these would be perfect for a summer night and definitely are a better version of the classic s’more.

Recipe review: Kitchen Sink cookies

By: Austin Bailey-Zimmerman

Ingredients

  • 1 cup salted butter softened
  • 1 cup light brown sugar
  • ½ cup granulated sugar
  • 2 large eggs
  • 2 teaspoons vanilla extract
  • 2½ cups all-purpose flour
  • 1 teaspoon baking soda
  • 1 teaspoon salt
  • 1 cup milk chocolate chips
  • 1 cup semisweet chocolate chips
  • 1 cup crushed pretzels
  • 1 cup potato chips
  • 4 graham crackers broken up
  • 1 cup toffee bits
  • Flaky sea salt for garnish

Instuctions

  1. Preheat the oven to 375°F.
  2. Line two baking sheets with parchment paper.
  3. In a large mixing bowl, beat together the butter and the sugars until they are creamy and combined, about 2-3 minutes
  4. Add in the vanilla and the eggs and beat again, until everything is evenly mixed together.
  5. Stir the flour, salt, and baking soda into the wet ingredients and mix.
  6. Add the milk chocolate chips, semi-sweet chocolate chips, crushed pretzels, potato chips, graham cracker pieces, and toffee bits into the mixture and stir just until evenly distributed.
  7. Scoop 1/3 cup sized balls of cookie dough onto the cookie sheets lined with parchment paper. Space them about 1 to 2 inches apart to allow for spreading.
  8. Bake the cookies for 10-12 minutes until golden brown
  9. Top with the flaky sea salt.
  10. Enjoy!

Review

I made these cookies for my friends and I to have. I have never tried to make these types of cookies before, and I was very pleased with the outcome. I absolutely loved the sweet chocolate, caramel, and graham crackers paired with the salty chips and pretzels. I also loved how crunchy the chips were along with the gooey chocolate and caramel. Overall, the cookies were very balanced, and the flavors compliment each other greatly.

I had decided to make these cookies because they honestly just looked so fun! My friends and I decided to have a bonfire because it was finally getting warm outside again, and I thought it would be great to have a treat with it. It was really enjoyable to make with my friends, we had a great time, and the outcome was so worth the time spent making them.

These cookies would be great for any occasion, whether it be a holiday, party, or just for fun. It is a great thing to make with your friends and family!

I got this recipe from House of Nash Eats by Amy (https://houseofnasheats.com/kitchen-sink-cookies). She did a great job with this recipe; it was all very easy to follow and to make.

I really enjoyed making these cookies, and had an even better time eating them with my friends! Try this recipe for yourself! Enjoy!

Recipe review: Chocolate Ganache Cupcakes

By: Austin Bailey-Zimmerman

Ingredients for Cupcakes:

  • 1 ⅔ cups of flour
  • 1 cup of sugar
  • ¼ tsp of baking soda
  • 1 ½ tsp of baking powder
  • ¼ tsp of kosher salt
  • ¾ cup of unsalted butter
  • 3 egg whites
  • 1 tbsp of vanilla extract
  • ½ cup sour cream
  • ½ cup whole milk

Ingredients for Frosting:

  • 2 cups of semi-sweet chocolate
  • 2 cups of heavy whipping cream

Instructions:

Cupcakes

  1. Preheat the oven to 350ºF.
  2. Sift the flour, sugar, salt, baking soda and powder into a large bowl.
  3. Mix the butter, egg whites, vanilla, sour cream, and milk into a separate bowl.
  4. Add the wet ingredients to the dry and mix until fully combined.
  5. Put cupcake liners into a muffin tin and fill them ⅔ of the way full.
  6. Bake for 18 minutes.

Frosting

  1. Heat the heavy whipping cream in a pot over the stove until simmering.
  2. Put chocolate into a medium sized bowl and pour the simmering cream on top.
  3. Cover the bowl with a plate for 2 minutes before mixing.
  4. Take the plate off and cover the bowl with plastic wrap and chill until smooth, creamy and set
  5. Beat the mixture until fluffy

Piping

  1. Put frosting into a piping bag.
  2. After cupcakes have fully cooled, pipe the frosting to cover the top
  3. Enjoy!

Review:

These cupcakes were absolutely divine. The cake was so fluffy and dense at the same time. The frosting was so creamy and the chocolate was so rich. I loved the sweet flavor of the vanilla cake and the frosting went with it perfectly because it was so rich. The two flavors complement each other perfectly.

I made these cupcakes with my friends, and we got the recipe from her grandma. They were very enjoyable to make, and we had a great time. It took us a while to make everything, but it was so worth it in the end. They were honestly the best cupcakes I’ve ever made and I will absolutely be making them again in the near future.

These cupcakes are perfect for any occasion, birthdays, holidays, celebrations, or just for fun! They are perfect for chocolate lovers and are so easy to share with everyone!

I hope you enjoy making these as much as I did! Enjoy!

Jam thumbprint cookie review

By: Norah Hoglund and Max Cahoon

Image created with Instagram AI

Overview

Jam thumbprint cookies are a classic Christmas or holiday cookie for this time of year. They not only look cute but they also taste really good. We tried out a recipe for them and are going to share our thoughts on it.

Link to the recipe:

https://www.loveandlemons.com/thumbprint-cookies/#wprm-recipe-container-53346

Review

Taste

These cookies had two components: the cookie and the jam. The cookie was like a shortbread cookie, and it was sweet and crumbly. They were also very buttery and they were quite a good cookie. If they didn’t have the jam in the center they would have been a bit boring, so good thing there was jam in the middle. It added a different tart flavor to the cookies as well as a fruity flavor and a different texture. The cookies would have been a bit dry without the jam but it made their texture perfect. We rate the taste an 8/10.

Baking process

The process of making these cookies was fairly easy. The cookie part was pretty straightforward to make and wasn’t really any more difficult than any other cookie. The hardest part was putting the jam in the middle of them, because it was sort of hard to be precise with a spoon and to not spill over the edge of the indent that was made in the cookies for the jam.

Another thing about the recipe is that it says to wait until the bottoms are lightly browned, so we put it in for 12 minutes but the bottom edge didn’t look brown at all, so we put it in for a little bit longer which made the cookies a little more dry. Other than that, these cookies were pretty simple to make. We rate the baking process a 7/10.

Overall

Overall, this recipe is pretty simple and straightforward and yields good results. The taste and texture is good and the blend of flavors is pleasant. The one thing that we would change is the instruction about looking for brownness, because you can’t see if the bottoms would be brown.

Overall, we rate this recipe a 7.5/10. We would recommend this recipe to anyone who enjoys baking, cookies, and especially the sweet jam.

RECIPE

Ingredients

Instructions

  1. Preheat the oven to 350° F and line two baking sheets with parchment paper.
  2. In a medium bowl, whisk together the two flours and salt.
  3. In the bowl of a stand mixer, cream the butter, sugar, vanilla, and almond extract until fluffy. Gradually add the flour and mix until completely combined.
  4. Scoop rounded tablespoons of the dough and roll them into balls. Place them on the prepared baking sheets. Gently press down to form discs and use your thumb, or the back of a 1 teaspoon measuring spoon, to make an indentation in the middle of the cookies. Use a spoon to spoon ½ teaspoon of jam onto each cookie.
  5. Bake for 12 to 15 minutes, until the bottoms are lightly browned. Let the cookies cool on the baking sheet for 5 minutes before transferring them to a wire rack to cool completely
  6. Then enjoy.

Christmas cookies

By: Sophie Elmstrom & Lily Sheldon

Photo by Jonathan Meyer on Pexels.com

The holidays have come to an end, but that doesn’t mean that all of the recipes that come with it do!

During the holiday season there are so many treats to make, with Christmas cookies being a staple recipe. There are so many different cookie recipes for the holiday season. We wanted to share a few of our favorite cookie recipes to make.

Sugar Cookies:

Sugar cookies are a classic, and are a very common cookie, not just made for Christmas, although once you add the red and green sprinkles it will add Christmas cheer! This is a very simple recipe, so it’s easy and quick to make. It’s sure to be a staple cookie to add to your holiday baking. These cookies have cream cheese in them, and that adds a richer flavor to them.

You can find the directions here: https://www.nourish-and-fete.com/sprinkle-sugar-cookies/

Hershey’s Peanut Butter Blossoms:

These cookies have a delicious peanut butter cookie base topped with a Hershey’s Kiss that is perfectly melted on top. These are a fan favorite, and they don’t take long to make either. With a simple list of ingredients, and a short baking time of 8-10 minutes, these cookies have the perfect texture with a slightly crispy outside and warm chewy inside, and the kiss on top adds the perfect flavor and richness to the cookie base.

Here is a simple recipe: https://www.hersheyland.com/recipes/peanut-butter-blossoms.html

Christmas Bark:

Christmas bark or “ Christmas crack” is a saltine layered base with chocolate and toffee pieces on top. This is a very versatile cookie, with the option to add any combination of chocolate and toppings to the saltine layer base. Here we have a version with milk chocolate and toffee pieces, which is our personal favorite combination. Other ideas you could make are white chocolate with peppermint, or milk/dark chocolate with various toppings such as M&M’s, pretzels, etc. This is a crunchy treat that is so delicious and a fun bake for the holidays!

Here is a recipe: https://therecipecritic.com/christmas-crack-recipe/

Sandwich Cookies:

These sandwich cookies are flaky and buttery, they crumble in your mouth. This recipe is very complicated and takes a while to make because you have to refrigerate the dough for the cookies before you roll them out and cut them. Even though these take time to make, they are so worth it and don’t have to be made in just the holiday season, you can make the frosting different colors for different events and enjoy them all year long! Make sure to bring these to a cookie competition, it will be a sure win for you.

Here is the recipe: https://inspiredbycharm.com/cream-wafer-tree-cookies/#Ingredients

Wreath Cookies:

The wreath cookies are an easy to make recipe without using an oven. All you have to do is melt marshmallows and combine them with rice crispy cereal, shape them into a wreath and add some green food coloring and you’re done! These cookies are very good and chewy and once you show them to people they will be begging for more. We’re sure you could make these into different shapes for different holidays and events.

Here is a simple recipe: https://www.allrecipes.com/recipe/10070/christmas-cornflake-wreath-cookies/

BEST ICE CREAM FLAVORS

By: Grace Lopez

Mystic Ice Cream flavor selection sign by: Whoisjohngalt via Wikimedia Commons
  • VANILLA

Vanilla is one of the most popular ice cream flavors there is in this world. It’s a really classic flavor to choose. This flavor is a really tasty and very awesome flavor to choose and especially if you put good toppings on it, it will make it much better.

  • CHOCOLATE

Chocolate is an amazing flavor to choose. This is also a very classic flavor to choose but a lot of people love it. It’s a really creamy fudge flavor and is perfect by itself or with toppings.

  • COOKIES AND CREAM

Cookies and cream is such a perfect and delicious ice cream flavor. What I love about this flavor is when it comes with cookie pieces inside for this ice cream. I would choose to eat it alone but you can do whatever you want.

  • COOKIE DOUGH

Cookie dough is one of my favorite ice cream flavors to eat. I love that it comes with cookie dough pieces that you can just eat and the sweetness is just really good, so if you really like really sweet ice cream I would definitely recommend this one.

  • NEAPOLITAN

Neapolitan is such a good combination of ice cream if you would like to try all in one. I really like this flavor because you can taste all the flavors, strawberry, vanilla, and chocolate, in just one lick. This flavor is also really popular and is a really great combination.

  • CHOCOLATE CHIP

Chocolate chip are also a really popular flavor to a lot of little kids because they really like the chocolate chips inside. This flavor is also a really good chocolate and sweet flavor for any one who likes those types of flavors combined.

  • MINT CHOCOLATE CHIP

Mint chocolate chip is personally not one of my favorite types of ice cream but a lot of people really enjoy the minty flavor combined with the sweetness of the chocolate, so I would recommend the flavor to people who like that.

  • STRAWBERRY

Strawberry is one of the most popular flavors. There are a lot of people who really like this flavor because sometimes it comes with natural strawberries inside and people really enjoy that. So, that’s why they like the flavor of strawberry.