Category Archives: Travel/Food

Best sites to see in the Twin Cities

By: Maggie Hong

Image via Wikimedia Commons

As we get closer to summer, there’s a lot of free time in the future. One great way to fill this time is exploring our cities through museums and historical sites. The Twin Cities Area has lots to offer when it comes to art, culture, and history. Here are three of my favorites, perfect for all ages and interests.

Minneapolis Institute of Art— Mia is a must see site in the Twin Cities. It has 143 galleries, showcasing almost 5,000 years of artwork from around the world. Permanent exhibits include African, Asian, American Indian, and European galleries, as well as various eras of American art. More immersive galleries include rooms decorated in Frank Lloyd Wright’s Prairie Style and period rooms themed around the Renaissance era, Ancient Japan, and the American 1950s. Be sure to check out rotating exhibits, which feature local and international artists.

Mill City Museum— The Mill City Museum might not be on the top of everyone’s sightseeing list, but it’s one of the most interesting museums in the cities. Built in the ruins of downtown Minneapolis’ Gold Medal Flour factory, this museum has interactive exhibits themed around Minnesotan milling history. Board historic train cars, bake bread, and ride a flour elevator while you learn about the people who worked in one of Minnesota’s biggest industries. A highlight of this museum for me is walking through the ruins park; a part of the building preserved as it was after the 1878 Mill City disaster, an explosion which leveled the building and damaged much of the surrounding area. You can see the old walls, outlines of rooms, and pieces of metal equipment that survived the fire.

Historic Fort Snelling— Historic Fort Snelling is a great place to learn about Minnesotan history, as well as experience the beauty of the Mississippi riverbank. Watch cannons fire and historic reenactors march military routes in this 1800s fort. Fort Snelling is also a great place to learn about Native history. Learn about Dakota language, history, and culture from community members and historic actors, and see how native people were treated during Fort Snelling’s time as an internment camp. Lastly, hear the story and see the living quarters of Dread Scott, a slave who sued the US government for his family’s freedom. So much history and many monumental moments have taken place at Fort Snelling, right in Highland’s backyard.

Recipe review: Kitchen Sink cookies

By: Austin Bailey-Zimmerman

Ingredients

  • 1 cup salted butter softened
  • 1 cup light brown sugar
  • ½ cup granulated sugar
  • 2 large eggs
  • 2 teaspoons vanilla extract
  • 2½ cups all-purpose flour
  • 1 teaspoon baking soda
  • 1 teaspoon salt
  • 1 cup milk chocolate chips
  • 1 cup semisweet chocolate chips
  • 1 cup crushed pretzels
  • 1 cup potato chips
  • 4 graham crackers broken up
  • 1 cup toffee bits
  • Flaky sea salt for garnish

Instuctions

  1. Preheat the oven to 375°F.
  2. Line two baking sheets with parchment paper.
  3. In a large mixing bowl, beat together the butter and the sugars until they are creamy and combined, about 2-3 minutes
  4. Add in the vanilla and the eggs and beat again, until everything is evenly mixed together.
  5. Stir the flour, salt, and baking soda into the wet ingredients and mix.
  6. Add the milk chocolate chips, semi-sweet chocolate chips, crushed pretzels, potato chips, graham cracker pieces, and toffee bits into the mixture and stir just until evenly distributed.
  7. Scoop 1/3 cup sized balls of cookie dough onto the cookie sheets lined with parchment paper. Space them about 1 to 2 inches apart to allow for spreading.
  8. Bake the cookies for 10-12 minutes until golden brown
  9. Top with the flaky sea salt.
  10. Enjoy!

Review

I made these cookies for my friends and I to have. I have never tried to make these types of cookies before, and I was very pleased with the outcome. I absolutely loved the sweet chocolate, caramel, and graham crackers paired with the salty chips and pretzels. I also loved how crunchy the chips were along with the gooey chocolate and caramel. Overall, the cookies were very balanced, and the flavors compliment each other greatly.

I had decided to make these cookies because they honestly just looked so fun! My friends and I decided to have a bonfire because it was finally getting warm outside again, and I thought it would be great to have a treat with it. It was really enjoyable to make with my friends, we had a great time, and the outcome was so worth the time spent making them.

These cookies would be great for any occasion, whether it be a holiday, party, or just for fun. It is a great thing to make with your friends and family!

I got this recipe from House of Nash Eats by Amy (https://houseofnasheats.com/kitchen-sink-cookies). She did a great job with this recipe; it was all very easy to follow and to make.

I really enjoyed making these cookies, and had an even better time eating them with my friends! Try this recipe for yourself! Enjoy!

Salted Tahini Chocolate Chip Cookies

Byt: Evie Beaumaster

The original recipe asks for:

  • 8 tablespoons/113 grams unsalted butter at room temperature
  • ½cup/120 milliliters tahini, well stirred
  • 1 cup/200 grams granulated sugar
  • 1 large egg
  • 1 egg yolk
  • 1 teaspoon vanilla extract
  • 1 cup plus 2 tablespoons/150 grams all-purpose flour, or matzo cake meal
  • ½teaspoon baking soda
  • ½teaspoon baking powder
  • 1 teaspoon kosher salt
  • 1¾cups/230 grams chocolate chips or chunks, bittersweet or semisweet
  • Flaky salt, like fleur de sel or Maldon

Makes 12 to 18 cookies

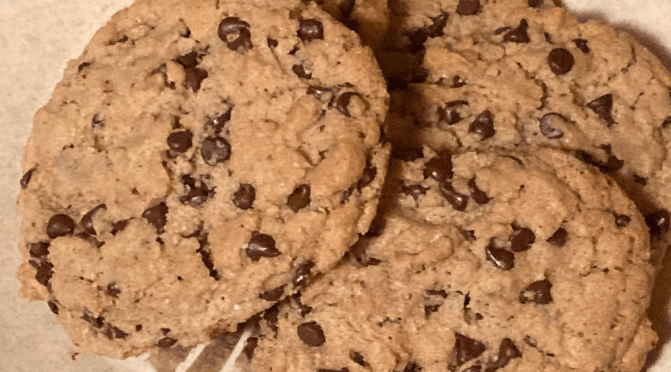
This recipe was so fun to make. It took a long time to make though, but it was so good! I really enjoyed the warm salty cookies that I got out of this recipe. I would totally make this recipe again.

To make these cookies you need to mix together the dough in an electric mixer. Then you need to refrigerate for at least 12 hours; this was the hardest part of the recipe and it is why the recipe took so long. The total baking time was about 15 minutes and it took a long time to bake all the batches of cookies. 

The baking and waiting time were a lot but overall the cookies were super good! This recipe was pretty easy to make, just throw all the ingredients into your electric mixer. The dishes used were also minimal because of this. The cookies came out of the oven warm and chewy with a bit of a salty taste that went great with the dark chocolate chips I used. Most people would say that they don’t like salty cookies but these are great! 

When I started making these I was worried that the tahini might be too strong for these cookies and it would be all that you could taste. But in the end, these cookies were perfect, the tahini added a slightly salty taste to the cookies and the flaky salt sprinkled on top just helped bring out the slight tahini flavor. I would say that people who might not like the taste of tahini as much would still love these cookies. For anyone who might not know what tahini is, it is like sesame paste and it tastes like a saltier version of peanut butter in my opinion. I like it plain as a substitute for peanut butter in some instances, but it is a bit runnier. I really enjoy the taste of tahini and it is great in these cookies.

The cookies came out of the oven chewy and warm and when I sprinkled them with some salt it was absolutely delicious. They are the best if you eat them right after you take them out of the oven and they are nice and warm. I will say I kept them in an airtight bag after I baked them and the next day they were stale so I would eat them the same day. You could also freeze or refrigerate them and heat them up later. I would totally recommend this recipe to help you take your chocolate chip cookies to the next level!

Link to original recipe! 

https://cooking.nytimes.com/recipes/1018055-salted-tahini-chocolate-chip-cookies

Homemade Tru Fru recipe review

By: Alice Rapacz and Evie Beaumaster

If you’re anything like us, you have tried Tru Fru and loved it. Like Tru Fru, other frozen chocolate dipped fruits are very good but they leave quite a dent in your pocket! We decided to try to make our own and to see if we could make something comparable, but for a smaller price.

Ingredients

  • 2 cups of raspberries (or other fruits we used strawberries)
  • 1 cup of white chocolate chips
  • 1 cup of dark chocolate chips
  • 2 teaspoons of coconut oil

To make the homemade Tru Fru, we chose to use strawberries as our fruit. We started by cutting the stems off our strawberries, coring them, and cutting them in half. You want to make sure that your strawberries are completely dry because when you freeze them, they will stick together if they are wet.

After the strawberries are all cut and washed, we put them on a baking sheet to freeze. We covered the baking sheet with parchment paper and made sure that the strawberries weren’t touching each other.

After about 3 hours, the strawberries were fully frozen. We kept them in the freezer while we prepared the chocolates. In two microwave safe bowls add the chocolates (separately) and a tablespoon of coconut oil. Microwave the white chocolate chips first, before doing the milk/dark chocolate, we chose dark. Microwave in 30 second intervals mixing in between each one.

Once fully melted we pulled out the frozen strawberries and added them into a bowl so we could put our dipped strawberries on the baking sheet. We used a fork to dip the strawberries in the chocolate and shook off the extra chocolate so that there would only be a thin layer of chocolate on each strawberry.

After half the strawberries were coated in white chocolate, we had to melt more chocolate to finish the rest of the strawberries and continue dipping the strawberries.

Once they all were coated in white chocolate, we moved onto the dark chocolate. We used the same process of melting, and because the strawberries were frozen to start, the chocolate hardened onto the strawberries so we did not have to put them back into the freezer. After they were all dipped, they were ready to eat!

In the end, the strawberries were really good. Since we used a fork to shake off extra chocolate, there was a nice and thin layer on the strawberries. If it was thicker, it would have been really hard to bite. If you leave the strawberries out for around 3 minutes before eating, it makes the strawberries thaw just enough so they are easier to eat.

The dark chocolate evens out the sweetness from the white chocolate, and the two pair well with the strawberry. Since they are frozen, they would be a perfect sweet treat for on a hot summer day. The strawberries are sweet and fresh, with the chocolate added, they are really good. We made the strawberries when some of our friends were with us. They all really liked them and thought they were a perfect treat to end the night.

Overall, the recipe was pretty easy to follow and the strawberries tasted really good. We think that this recipe is a great way to save some money if you also like Tru Fru. We made around 40 strawberries and the total cost was around $11.78. A typical Tru Fru bag comes with around 16 strawberries for $6.99. For the homemade strawberries it cost around 30 cents per strawberry, the Tru Fru cost around 43 cents. While this is not that big of a difference, we both thought it was worth it. Not only was it fun to make, but we also got to have a delicious treat too. If you ever want a fun and delicious treat to make, we definitely recommend this homemade Tru Fru recipe.

The original recipe!

https://www.liveeatlearn.com/frozen-chocolate-raspberries/

Recipe review: Chocolate Ganache Cupcakes

By: Austin Bailey-Zimmerman

Ingredients for Cupcakes:

  • 1 ⅔ cups of flour
  • 1 cup of sugar
  • ¼ tsp of baking soda
  • 1 ½ tsp of baking powder
  • ¼ tsp of kosher salt
  • ¾ cup of unsalted butter
  • 3 egg whites
  • 1 tbsp of vanilla extract
  • ½ cup sour cream
  • ½ cup whole milk

Ingredients for Frosting:

  • 2 cups of semi-sweet chocolate
  • 2 cups of heavy whipping cream

Instructions:

Cupcakes

  1. Preheat the oven to 350ºF.
  2. Sift the flour, sugar, salt, baking soda and powder into a large bowl.
  3. Mix the butter, egg whites, vanilla, sour cream, and milk into a separate bowl.
  4. Add the wet ingredients to the dry and mix until fully combined.
  5. Put cupcake liners into a muffin tin and fill them ⅔ of the way full.
  6. Bake for 18 minutes.

Frosting

  1. Heat the heavy whipping cream in a pot over the stove until simmering.
  2. Put chocolate into a medium sized bowl and pour the simmering cream on top.
  3. Cover the bowl with a plate for 2 minutes before mixing.
  4. Take the plate off and cover the bowl with plastic wrap and chill until smooth, creamy and set
  5. Beat the mixture until fluffy

Piping

  1. Put frosting into a piping bag.
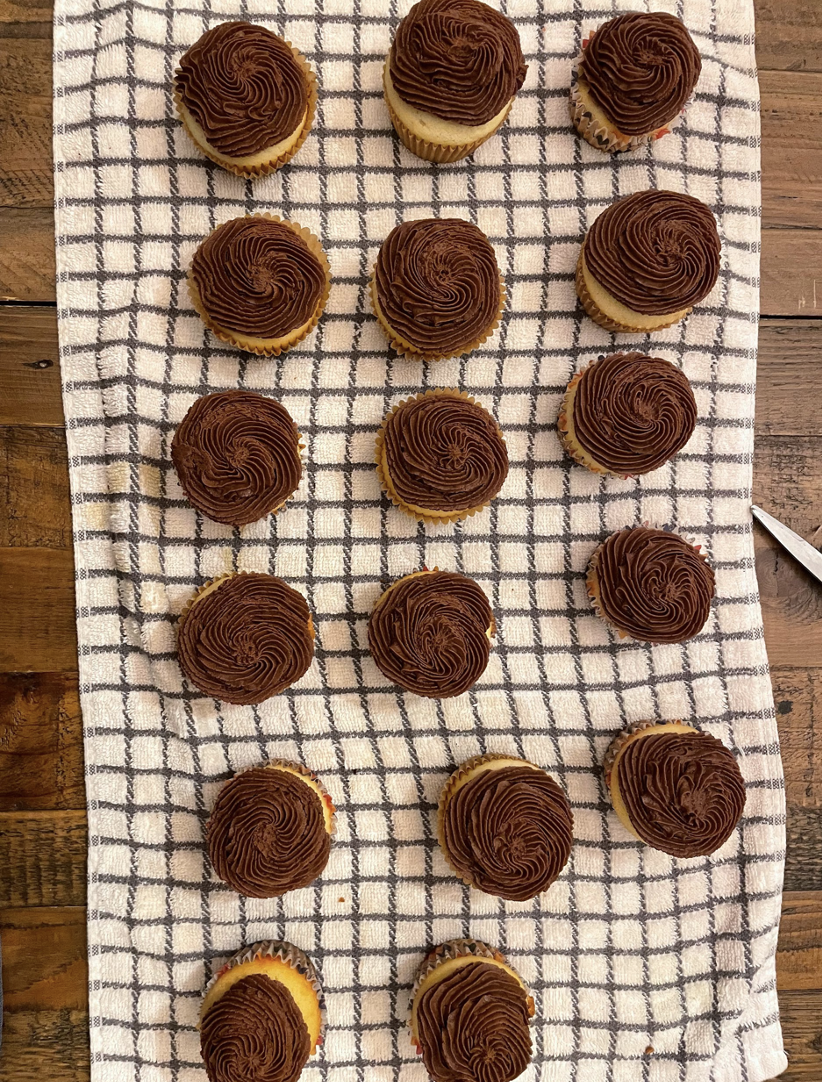
  2. After cupcakes have fully cooled, pipe the frosting to cover the top
  3. Enjoy!

Review:

These cupcakes were absolutely divine. The cake was so fluffy and dense at the same time. The frosting was so creamy and the chocolate was so rich. I loved the sweet flavor of the vanilla cake and the frosting went with it perfectly because it was so rich. The two flavors complement each other perfectly.

I made these cupcakes with my friends, and we got the recipe from her grandma. They were very enjoyable to make, and we had a great time. It took us a while to make everything, but it was so worth it in the end. They were honestly the best cupcakes I’ve ever made and I will absolutely be making them again in the near future.

These cupcakes are perfect for any occasion, birthdays, holidays, celebrations, or just for fun! They are perfect for chocolate lovers and are so easy to share with everyone!

I hope you enjoy making these as much as I did! Enjoy!

The history of Bubbl’r

By: Teagan Mack

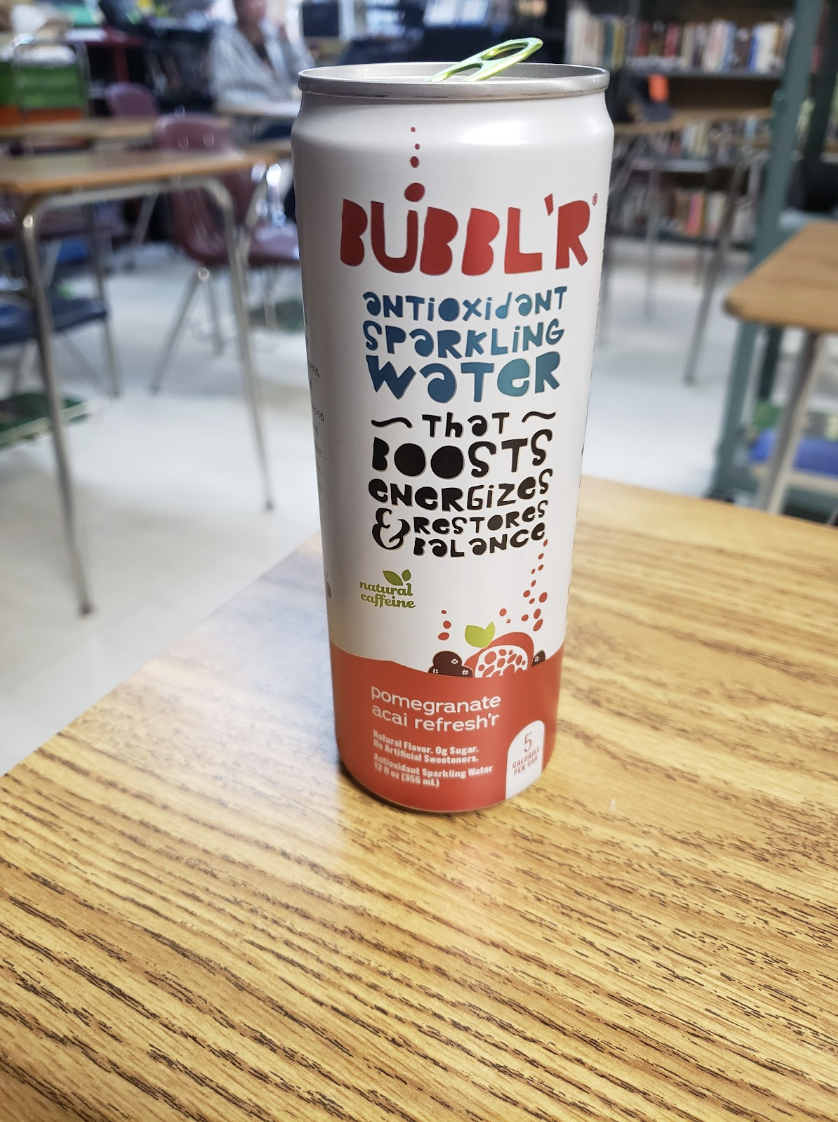
Bubbl’r, a refreshing sparkling water, has become a favorite drink in high schools across the country. But how did this fizzy drink become so popular? Let’s take a look at the history of Bubbl’r and how it went from a simple idea to a beloved beverage among students.

Bubbl’r was created by a company called Bubbl’r Beverages and launched in 2019. The idea behind Bubbl’r was simple: make a sparkling drink that’s not only refreshing but also healthy. They wanted to create a drink that had all the fun of soda but without all the sugar and artificial ingredients. Unlike most sparkling waters, which often taste plain, Bubbl’r added fun, fruity flavors to stand out. With zero calories, no added sugars, and a variety of exciting flavors, it was the perfect alternative to sugary sodas.

From the beginning, Bubbl’r quickly gained popularity, especially among teens. The drink became a hit because it was both tasty and refreshing, offering a light, fizzy taste with flavors like Cherry Lime, Mango Passionfruit, and Tropical Blast. As Ellie Harris remarked, “I love how Bubbl’r have a such diverse range of flavors.”

Bubbl’r also caught the attention of students who were looking for a healthier option to quench their thirst. As more people started to realize the benefits of drinking sparkling water instead of soda, Bubbl’r became a popular choice for students trying to cut back on sugar while still enjoying a delicious drink.

The reason Bubbl’r became such a hit with high school students can also be traced back to its clever marketing. The bright colors and fun, youthful branding caught the eye of teens, and the drink became a social media sensation. Teens shared their love for Bubbl’r on platforms like Instagram and TikTok, helping the brand spread quickly. Its fun design and catchy slogans made it impossible to miss in stores, and soon it was everywhere. Even teachers like Ms. Rise couldn’t help but notice Bubbl’r, “I saw students in my IB Geo class drinking bubbl’r and I became interested about why it was so popular. So I got it and I tried it an I loved it. I love it because it tastes like a soda pop and it’s supposed to be really healthy.”

Another factor that made Bubbl’r so popular is its convenience. The drink comes in easy-to-carry cans, making it perfect for students who are always on the go. Whether they were grabbing a can from the vending machine between classes or taking it to lunch, Bubbl’r became the drink of choice for busy high schoolers. Its simple, fizzy taste made it the perfect companion for after-school activities or study sessions. Just take it from Evie Beaumaster, “It keeps me alive and energized throughout the long days of school.”

In addition to its great taste, Bubbl’r is also environmentally friendly. The company uses recyclable cans, which is something that many students appreciate as they become more aware of environmental issues. Bubbl’r’s commitment to sustainability has only helped it grow in popularity, as more teens are looking for brands that care about the planet.

So, the next time you grab a Bubbl’r from the vending machine or share your favorite flavor with a friend, you’ll know a little more about the history behind the drink that’s become a hit in high schools everywhere. From its simple beginning to its rise in popularity, Bubbl’r has made its mark—and it’s here to stay.

For more information, please visit:

Recipe review: Dubai chocolate bar

By: Austin Bailey-Zimmerman

Ingredients:

  • 2 cups of Kataifi
  • 1 tbls butter
  • 1 cup of pistachio paste
  • 2 ½ cups of milk chocolate

*You can get Kataifi and pistachio paste online and at stores like Golden Nuts

*need a chocolate bar mold*

Instructions:

  1. Roughly chop up the kataifi dough.
  2. melt your butter in a nonstick skillet over medium-low heat, coating the pan.
  3. Add in the chopped kataifi threads and stir occasionally until they become golden brown (about 5-10 mins) and remove from the skillet.
  4. In a large bowl, mix the toasted kataifi with pistachio paste, then set aside.
  5. Melt the milk chocolate in a double boiler.
  6. Spread the melted chocolate on the inside of the chocolate bar mold until it covers the entire bottom.
  7. Freeze for 10 mins.
  8. Spoon the pistachio and kataifi mixture into the mold. Use a knife to flatten the filling and ensure it is spread to the sides of the mold.
  9. Gently add a top layer of milk chocolate to the mold.
  10. Freeze for another 10 mins or until the chocolate hardens.
  11. Enjoy!

Background:

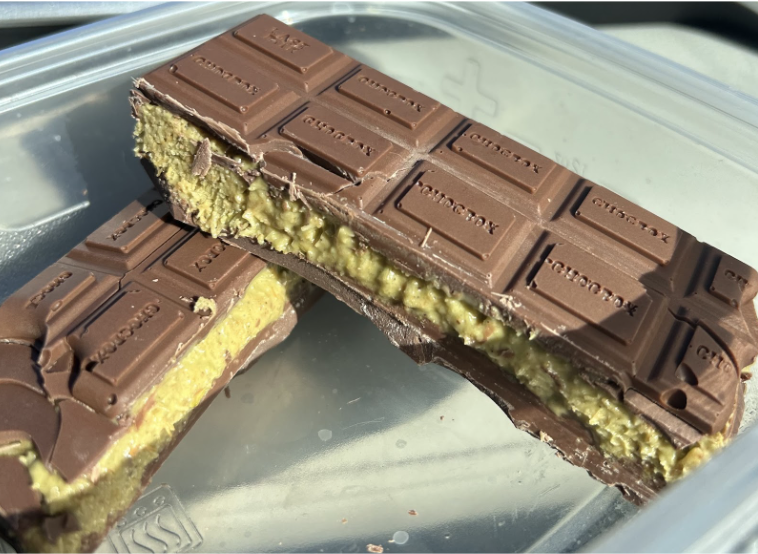
The Dubai chocolate bar is a viral chocolate bar filled with Kataifi, which is tiny shredded crunchy dough, and pistachio cream. It is originally a dessert from Dubai, and is from Fix Dessert Chocolatier, where the catchphrase is “Can’t get Knafeh of it”. The chocolate bar has become a viral dessert in 2024 particularly on TikTok.

Review:

I absolutely loved this recipe. I have been seeing Dubai chocolate all over the internet and I have wanted to try it for so long. I found this great recipe and got a chocolate mold and decided to try it out for myself. My friend and I followed this very easy step-by-step recipe, and the result was amazing!

The chocolate bar was so sweet and the filling was the perfect mixture of crunchy and creamy. The pistachio and chocolate went together perfectly, the flavors balancing each other out. The bar was very big and I could easily split it with my friend.

I got this recipe from https://www.chocolatesandchai.com/dubai-chocolate-bar/ by Sarah Hamouda, and she did a great job making the recipe easy to follow and have great results every time!

I will definitely be making this again, and so should you! I hope you enjoy!

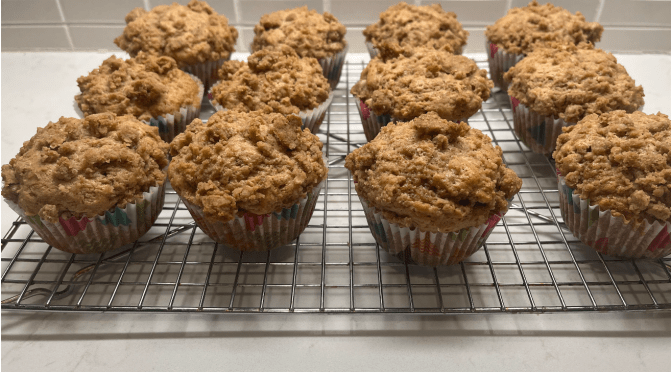
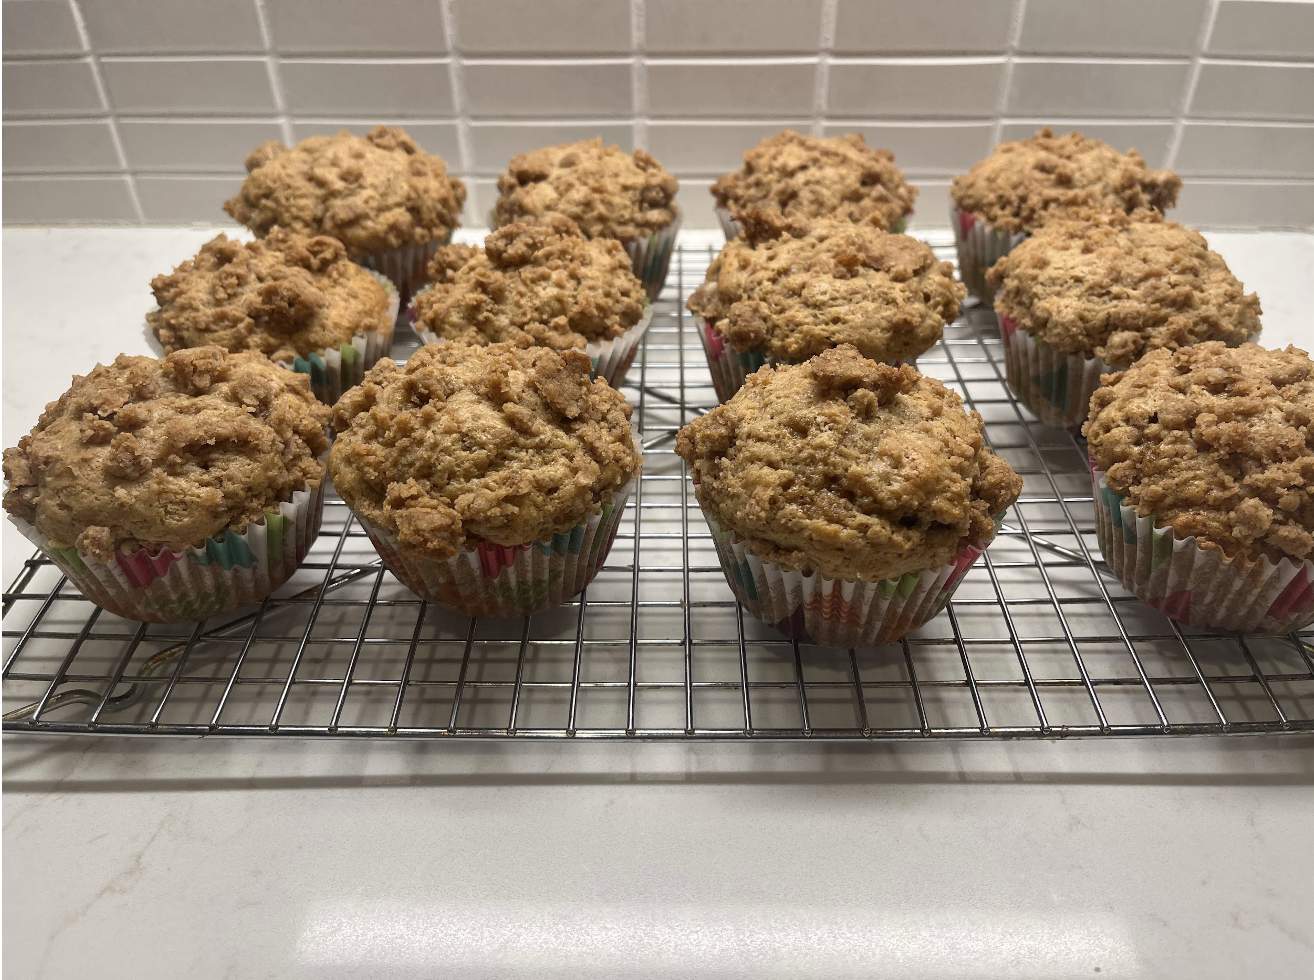
Cinnamon Streusel Muffin Review

 By: Alice Rapacz

Ingredients:

Muffin

  • 1 ¾ cups all-purpose flour
  • 1 ½ teaspoons baking powder
  • ½ teaspoon baking soda
  • 1 teaspoon ground cinnamon
  • ½ teaspoon salt
  • ½ cup/8 tablespoons unsalted butter (at room temperature)
  • ¾ cup light brown sugar
  • 2 eggs (at room temperature)
  • ½ cup sour cream (at room temperature)
  • ¼ cup whole milk
  • 1 tablespoon vanilla extract

Cinnamon Streusel Topping

  • ½ cup all-purpose flour
  • ¼ cup light brown sugar
  • 1 teaspoon ground cinnamon
  • 3 tablespoons unsalted butter (melted)

Directions:

  1. Preheat the oven to 425 degrees. Line a 12 count muffin tin with cupcake liners or spray with non-stick cooking spray.
  2. In a medium bowl add the flour, baking powder, baking soda, cinnamon and salt, combine together.
  3. In the bowl of a stand mixer or in a large bowl with an electric mixer, cream together the butter and sugar, about 2-3 minutes.
  4. Add in the 2 eggs, sour cream, milk, and vanilla. Beat on medium speed until just combined.
  5. Add in the dry ingredients and use a spatula or spoon to combine just until there are no more dry flour patches remaining.
  6. Make the streusel topping by melting the butter in a microwave safe bowl. Next add the sugar to the melted butter and mix until combined. Then add the flour and cinnamon and mix together until you have clumps of the mixture.
  7. Put the batter into the muffin tin, making sure to fill the liners all the way to the top.
  8. Sprinkle each muffin with the streusel topping.
  9. Bake the muffins for 5 minutes at 425 degrees and immediately reduce the heat to 350 degrees and bake for an additional 12-15 minutes.
  10. Once a toothpick can be inserted into the muffin and comes out clean, the muffins are done.
  11. Allow the muffins to cool for 5 minutes in the muffin tin, then take them out and let them cool on a wire rack.
  12. Lastly, Enjoy!

Review:

I thought that this recipe from Chisel & Fork was really good. Typically for baking recipes, I like to use Sally’s Baking addiction, but this time I wanted to try something new. I found this recipe for Cinnamon Streusel Muffins and wanted to give it a try. I thought that the recipe was easy to follow and understand. I followed the directions step by step, first measuring out my dry ingredients, and in a separate bowl my wet. I used a stand mixer to combine the wet ingredients, and I found that the end result is not as smooth as I thought it would be. There were small chunks of sour cream in the mixture even though I had mixed it for more than enough time. I was a little surprised at first, but once I added the dry ingredients into the wet, it all came together really nicely.

Once I divided the muffin batter into the tin, I topped each muffin with the streusel. I added too much on the first muffins, so I had to divide and sprinkle them onto other muffins to make sure there was enough for each one. Once they were baked, they filled my house with a warm cinnamon smell.

When I tried the muffin warm for the first time, it had a perfect texture, light, and fluffy. The streusel on top added a perfect crunch, that wasn’t too crunchy, it just added the perfect texture. The muffin itself had a nice cinnamon flavor, but I thought that the addition of the streusel was needed for extra cinnamon flavor. Everyone in my family tried them and two days later all the muffins were gone. They are the perfect sweet treat or easy on the go breakfast. Overall, I would definitely recommend this recipe if you’re looking for a quick, easy and delicious muffin recipe.

The history of Trolli

By: Maya Song

Trolli is a long standing candy manufacturing company known all across the world. It was founded in Germany in 1948 by Willy Menderer, which was then passed down to his son, Herbert Mederer in 1981. The company is now operated by the Mederer group which acquired the company in 1998.

The company expanded its reach to the United States in 1982, which introduced their product to a whole new population. Places such as Asia, North America, and Europe all saw the potential of this brand and invested in helping it grow. The fact that Trolli was given the opportunity to sell its products internationally really helped the company reach the status that it holds today, as one of the world’s biggest candy manufacturing companies ever.

They reached their highest accolade in 1993 when their famous sour glow worm won the Candy Kettle Award, a highly prestigious award that other famous companies like Ferrero, Lindt, Nestlé, and Haribo have won.

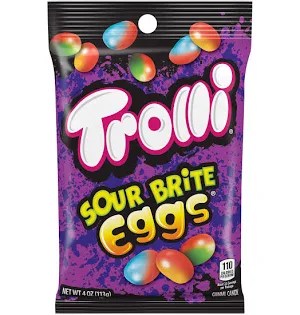
Some of their bestsellers include the sour brite crawlers, peach rings, and my personal favorite, egg gummies. Trolli is well known for having very creative flavors and designs as well as experimenting with sour flavors. The company does not sit on their laurels but constantly comes out with new things for consumers to try. They provide a variety of different gummy candies and have become a very successful and popular company due to their innovation.

While there are a plethora of other candy manufacturing companies around the world that compete with Trolli, Trolli will always be one of the originals. Trolli has remained one of the most successful ones out there for nearly 75 years, while it continues to grow its brand and followers.

In my personal opinion, I truly love Trolli gummies, especially the gummy eggs. I think that they are definitely worthy of their status, and it is always a guarantee to fulfill a sweet craving.

Recipe review: Rosa Pasta Sauce

By: Austin Bailey-Zimmerman

Ingredients:

  • 1 tbls of olive oil
  • 1 onion (diced)
  • 6 cloves of minced garlic
  • 2 tsp of dried oregano
  • 24 oz. of your preferred tomato pasta sauce
  • ¾ cups of heavy cream
  • pepper and salt
  • 16 oz of penne pasta, cooked al dente
  • Optional: garlic bread

Instructions:

  1. Cook your pasta until al dente, drizzle with olive oil and season with a pinch of salt and pepper (or to taste) and set aside.
  2. Heat oil in a large pan over medium heat.
  3. Add diced onion along with a couple pinches of salt and pepper, and cook for 4 minutes (stir frequently).
  4. Add in the garlic and oregano and cook for 1 minute (stir frequently).
  5. Add preferred pasta sauce and stir till combined.
  6. Cook for 3-4 minutes (stirring frequently) until pasta sauce is heated all the way through.
  7. Remove the pan from heat and stir in heavy cream.
  8. Season to taste with salt and pepper.
  9. Add pasta and toss to coat evenly.
  10. Optional: add garlic bread.
  11. Enjoy!

Review:

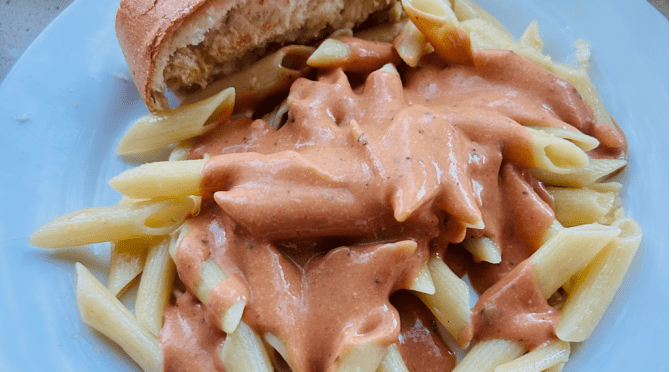
This recipe was absolutely delicious. I made it for my family for dinner, and they all loved it! We all went back for seconds because we enjoyed it so much.

The sauce is altogether so creamy and enjoyable to eat. The sauce also has a lot of flavor to it from the warm tomato flavor to the savory onion and sweet cream. I like how you can also make this recipe your own by using whatever base sauce you want and adding things to your specific taste.

I got this recipe from https://midwestfoodieblog.com/penne-rosa by Kylie. She has created this recipe to be so easy and affordable, and it doesn’t take a lot of time to have a full dinner for your family!

The sauce has the perfect ratio of flavor and paired with the noodles, it is an amazing, filling and healthy dinner!

Try this recipe out for a great dinner! I know I will for sure be making this again! Enjoy!