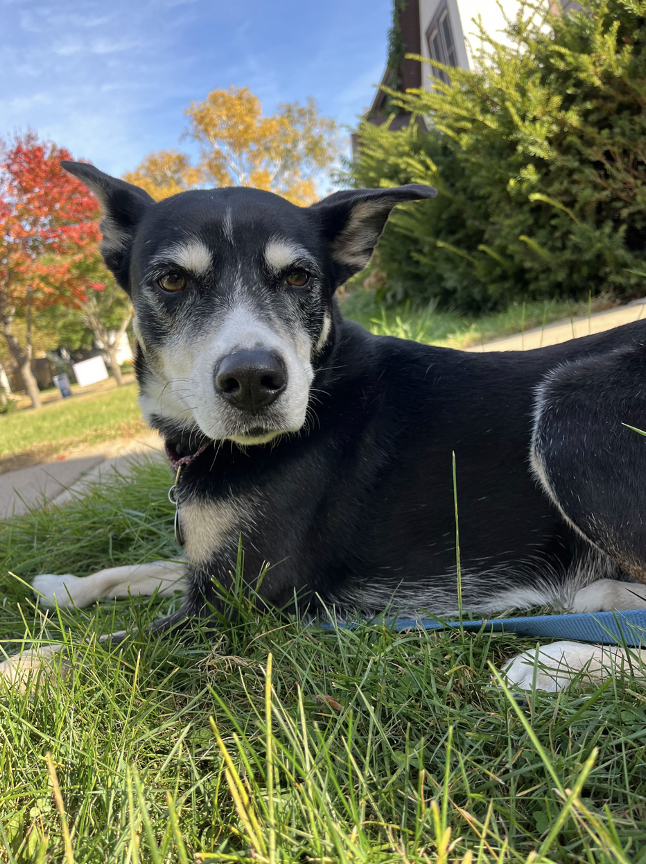
Category Archives: Advice/How To

HOW TO MAKE A FASHION BOOK/TEMPLATE

By: Charlotte Bistodeau

Many people want to get into fashion designing but don’t know where to start. You might think you need fabric, special notebooks, special pencils (which is all true eventually but not in the beginning). Here I’ll take you through some of the simple things that will make getting into fashion design easier overall.

The first thing you’ll want is a fashion book. Any notebook can be a fashion book, but there are many things I’ll suggest here that will make things simple.

  1. I suggest a notebook that has blank pages (think sketch books). Having lines on your paper may distract you from the final product.
  2. When choosing your sketch book you want to think about what art supplies you’re going to use most. Example, If you are going to be using a lot of watercolor then choose a sketchbook with watercolor paper.
  3. Your sketchbook does not have to be fancy, in fact you can purchase one at Five Below and you’ll be fine.
  4. Small sketchbooks are a great starting point especially if you have no clue what to do or design. Less space means less stress on the line and makes it seem like you’ve done more.
  5. A bigger sketchbook might feel like a nice idea (not filling it up as fast, having more room) but it can make you feel threatened by how little you seem to have drawn or how much you still have to draw.
  6. Don’t pick out your sketchbook for ascetic purposes. Just because it looks nice doesn’t mean you’ll like the feel of it. You should check to see if you like the feel of the grain and if it works with the main art supplies you choose to use. If you really are worried about it looking nice, you can always decorate the cover yourself with paint, paper, stickers, etc. and make it your own.

The second thing you might want to do is create a stencil to make it easier to draw your design. So, here are the steps to make a stencil.

First, you’ll want to sketch out a picture of a model template. After you finish your drawing and are happy with it, you should take a photo for a later step.

Second, you’ll want to glue your drawing down on a piece of cardstock or thin flat cardboard. Example, I used a side from a box of ice cream (taken out of recycling).

Third, you’ll want to use an exacto knife or box cutter to cut out the drawing from your template; make sure if you have extra pieces (example, for me it was the gaps between the body and arm) that you find a way to keep them connected to the rest of the stencil. Also make sure to have an extra piece of cardboard, cutting mat, etc, to make sure you don’t scrape whatever surface you’re cutting on.

Now you can take a pencil and trace it. Notice I drew on a lined sheet of paper; I did this as an example and if I am actually going to use the template I’ll draw it on a blank sheet. Going back to the first step, look at the photo you took of the original drawing and add anything you may have missed with just the basic stencil (Red is what I added to make it look better).

Now you have your fashion book and stencil and can start your fashion drawing experience!

Why are dogs a good pet to have?

By: Isabel Strack

There are many benefits to owning a dog. Here are some of the health benefits that a person may get from having a dog as a pet.

Dogs are good pets to have because they can help you feel less alone. Dogs can help a lot with your mental and physical health and they can help you even when other people can’t. Owning a dog can lower your chance of feeling socially isolated, which can reduce the risks of heart attacks. When someone is socially isolated it can affect your mental health.

Dogs encourage you to move and get out of the house. Owners spend almost 300 minutes every week walking their dog. That is 200 more minutes of walking than for people who aren’t pet owners. When walking your dog, it can make you look more approachable and give someone a good conversation starter. Researchers found that about 40% of dog owners have a easier time meeting new people and making new friends. Dog owners can interact with more people like other dog owners they encounter on their daily walks.

Dogs can help lower your stress level. Many studies have shown that dogs can help relieve stress and anxiety. Just petting a dog that you may know can help lower your blood pressure, slow your breathing, and help relax tense muscles. Research has shown that a bond between humans and dogs can lower your stress levels, which is a big cause of cardiovascular problems.

Dogs help you increase your activities. They give you reasons to go outside and get physical activity everyday. Dogs force you to get up and move. A research study has found that people who own dogs are more likely to do regular physical activities, then for people that don’t own any dogs. They require daily exercise. Over time this exercise can help strengthen your muscles, bones and joints. You might notice that your usual walk or run with your dog will start to feel easier.

For more information, please visit:

Benefits of owning an aquatic animal

By: Bailey Glime

Photo by MART PRODUCTION on Pexels.com

Aquatic pets are very popular for lots of families but did you know all the benefits it holds as well? Aquatic animals can be very therapeutic for lots of people. This helps regulate mood and stress even if just a little. Examples of all the ways an aquatic animal can be therapeutic are listed below:

  • Improving mood: By owning an aquatic animal our mood is overall happier.
  • Relaxation: Relaxation is another big factor fish contribute to humans. By watching your aquatic animal it brings you to a relaxed state.
  • Productivity: In some cases your aquatic animal might make you feel like you should be more productive and do more activities.
  • Blood Pressure: Aquatic animals can help reduce blood pressure just by watching them.
  • Mental health: Overall all these help to contribute to your mental health and having a good mental health is important to have every day.

Other benefits of aquatic animals are that they don’t need to be as tended to as mammals; this would give some people the feeling of having more time and still having a pet.

Aquatic animals are not a necessary pet to have in your home but they do provide benefits of relaxation and positive mental health.

For more information, please visit:

Why eggs are the most nutritional breakfast option

By: Max Cahoon

According to the ‘Keck Medicine of USC’s’ Kurt Mong, eggs are a great source of high protein and also have very low calories. Eggs also contain a ton of vitamins and nutrients that your body needs.

Many people eat eggs to maintain or lose weight as well. Research shows that people that eat eggs may lose up to 65% more weight than people that eat their eggs with a bagel, according to ‘Sauder’s Eggs’

People think that what they eat in the morning doesn’t affect your body throughout the day, but it actually does both physically and mentally. Breakfast options like cereal or donuts may slow you down, but eggs improve your physical and mental health for the entire day. This is because of the nutrients/vitamins that are in eggs. Eggs have vitamin B12, vitamin D, and iron, which are all huge benefits to your bones and brain.

Eggs are also a protein powerhouse. Eggs are a very good option for people that workout/go to the gym because of the protein. Kirkland brand eggs have 6 grams of protein per egg, meaning if you eat 5 eggs every morning you will already have half of your needed grams of protein for the day, and protein builds muscle.

According to the ‘KRQE’ eggs are America’s favorite breakfast food and around 65% of people throughout the United States eat eggs every morning for breakfast. Eggs are also a very good food to combine other foods with, for example a lot of people will make eggs with sausage or bacon or fruit which makes it into more of a meal.

Another appealing factor about eggs is that there are so many different types of eggs to make, some people even go as far as to say that there are over 100 ways to cook eggs. A couple examples would be scrambled, hard boiled, sunny side up, and omelet, but those are just the popular ones, there’s a ton more that I didn’t mention.

10 things freshmen should know

By: Priya Anderson & Ruby Anderson

Priya’s Iphone, September 12, 2024. Two freshmen walking to class.

1. Go to orientation!

One of the first most important things for a freshman to do (especially rising freshmen) is to go to orientation. If you are already a freshman in school, skip this one, but those who are coming up, keep reading.

This is not only where you learn the school, you learn your schedule, who will be in your advisory, who you will be peers with for the rest of high school. The schedule you receive is usually paper, which is helpful for those with iPad issues (common among freshies). And at orientation, you see the teachers and office staff; obviously an important factor to becoming acquainted with your school. By attending orientation, the transitional process is much smoother and easy to cope with. It can be nerve racking, but is worth the 2 hours.

2. Get involved in school activities

School activities get you connected with more than students, but with opportunities for your sophomore, junior and senior years. You can make friends that last, and will always find someone on your team/in your club in your classes. Almost everyone is involved with a school activity, so participating in your community is a great way to allow yourself to become a part of your high school.

3. Make connections with upperclassmen

As I said in my last point, try to befriend or connect with upperclassmen! Try to find someone you can trust to get info about the school and about classes. This can be helpful when learning about the school and getting tips on big assignments. Upperclassmen can also help get you connected to more people. Of course, have boundaries with these kids, and make sure they are trustworthy friends.

4. Don’t procrastinate

Procrastinating is the number one way to fail. You should try to complete your work as soon as possible because it will help a lot with getting good grades. A good way to not procrastinate is to make a planner. Making a planner will help a lot with keeping track of what assignments you have to do and when they are due.

5. Sign up for drivers ed

Once you turn 15, you can get your permit. Even though driver’s ed is very tedious (30 hours), it is worth the time to learn to drive. You could even get your license as a sophomore! It is 3 hours for two weeks, and that is awhile, but what’s better? Freedom or having to hitch a ride every day?

6. Find a favorite teacher/class

Having a teacher that you like or a class that you enjoy will get you through the day a lot faster, especially if you can look forward to that class. It’s also good to have a teacher you trust so that you can go to them if you have a problem. Having a class that you like can also motivate you to do your work.

7. Do not skip class or be late

Skipping class or being late is a great way to get on a teacher’s bad side. As a matter of fact, too many absences and tardies will get you on a list and a call home. Coming to class at the correct time and always showing up will define you as a trustworthy student. It will also set a routine for you and habits will form out of those routines. Being late in the workforce is a BIG no, so starting early, come to class. For freshmen, this is very important to get used to.

8. Ask for help

Can’t find a class? Don’t have an iPad? Don’t know your bus, etc, etc? Ask for help. As a freshman, no one expects you to know what to do right away. There are always students and teachers there to help, and the counselors office is a great resource for freshmen. Not only can you get help with the issues above, but you can change electives and if necessary, move core classes around. Don’t be afraid to reach out to your friends and peers. Your teachers also expect you to ask for help, so please don’t hesitate.

9. Bring snacks/drinks

School days can get long and tiring and sometimes lunch is not enough. Especially if you have lunch really late or really early in the day you are going to get hungry pretty fast. You should make sure to bring a few snacks to school everyday as long as your teachers are okay with it. Bringing water is also important during hot days.

10. Relax

Don’t get too stressed out over school. If your only focus is school work you’re going to get stressed and burnt out. School is important but relaxing and enjoying time to yourself and spending time with friends and family is just as important. You also need to make sure you’re getting enough sleep every night so don’t stay up too late.

How to manage school stress

By: Calla Fragassi

Image generated by: Deepai.com

Coming towards the last couple weeks of the school year, I’ve realized that there are a lot of things I either did, or wish I did, to help manage my stress throughout this school year. I’ve had to come up with ways to keep myself on task with school but also not let my work pile up too much to the point where it was more than I could handle. Here are a few of the best tips I’ve learned when it comes to managing school stress:

Staying organized

Staying organized is the key to keeping up with your schoolwork. Keeping a tidy and clean place to do homework like a desk or at a table will help you focus on finishing your assignments without distractions. This also goes for keeping your papers and notebooks organized; use folders and try to keep everything as put together as you can!

Use your school resources/ work time

One thing I’ve found extremely helpful with school is using the resources and time given to me in class. This includes asking for help from teachers and peers, using given class time to complete assignments, as well as using different places to get work done like the CCRC or the library. Focusing on getting your work done in school and asking questions will limit the amount of time you will have to spend outside of school on assignments.

Get good sleep

Getting a good night’s sleep before school will encourage you to be more engaged in school, and will improve your brain’s ability to focus and process information. Being deprived of sleep will make your body weaker and you will be more susceptible to becoming stressed. I try to get at least 8 hours of sleep every night to help reduce my stress levels during the school year.

Keep a schedule

Last, but not least is keeping a schedule. This has been the most helpful thing for me this school year to stay on top of my schoolwork. Making a list every Monday of all the work I need to complete by the end of the school week, and the due dates of my assignments, is a great way to remember what I need to get done. This helps me plan out a schedule for which assignments will take more time/need more attention. I would also recommend getting a planner or downloading an app to help you visualize what work you need to finish by the end of the week or before the due date.

Overall, there are many different ways to reduce your stress levels during the school year to help enhance your academic performance as well as your mental and emotional well-being. Focusing on these different strategies is especially important because it can benefit you with lifelong stress management skills. Each of these has helped me this school year and I hope they can benefit you as well.

How to cross a river

By: Trump Vang

Imagine yourself in a situation where you’d have to travel across a river. This could be anywhere from a simple land travel obstacle to a dangerous and cautious situation. Either way, knowing how to cross a river may not be integral, but will be helpful in specific situations.

Now one may wonder how they got themselves stuck in this situation. There could be a multitude of reasons, but the focus at this very moment should be placed within crossing the river. There is a reason why you’re crossing it, and that reason is pushing you to cross it as fast as possible. Regardless, here’s a guide to cross a river:

1) Assess your Situation: 

Look at what you’ve got around you as there may be things that are helpful to you in their own way. Even if it may seem ordinary, there are things that can help you in the most dire of situations.

For instance, when a woman, Angela Hernandez, found herself in danger in a sinking car, she was able to escape and find her way to land. Finding herself trapped, she scourged for clean drinking water. Using a garden hose from her car, she was able to collect water, and through this she was able to survive through the ordeal. Hearing from Angela’s story, it’s important to pay attention to your surroundings and know where you are and what you can do.

2) Plan your Travel

Rivers are not easy obstacles to cross. You will need a plan to cross a river, and it may be extensive depending on the width you’d need to travel. On average, rivers flow at a rate of 5 km an hour (3 miles an hour), so be wary of these issues.

Depending on the items you’ve picked up, you can plan ahead of what you’re thinking through. For example, a river with a low enough width can be crossed with a log or a “bridge”. If it has low enough depth or is flowing slow enough, it’s possible that you could swim across it. Assess and plan using the knowledge you’ve got.

Remember, it’s dangerous to head into a situation blindfolded. Make sure you know what you’re doing. Plan thoroughly and ensure that you cover each step and have back up plans in case something goes amiss.

3) Cross the River

This is it. The moment that you’ve been waiting for. Cross the RIver! You’ve planned ahead up until this point, and it’s led you to this. Drop the rest of your fears and anxieties, as this is the main step to crossing a river. Whether or not you decided to cross a fallen log, create your own boat, or plain out swim, you’ve stood up against your river crossing issues and have been able to beat them whole-heartedly.

Hey, if you’ve made it this far, you’ve most likely crossed the river! Congrats to you and your ability to do so! Now face the world with your motives and lead yourself to success by conquering problems through river crossing.

For more information on Angela’s Story, please visit:

If you’re looking for more information on rivers, please visit:

Top 6 most popular pets in the U.S.

      By: Calla Fragassi

Image generated by: DeepAI

As of this year, over 90 million households in the U.S. own a pet. Since the COVID-19 pandemic, the number of pets in the U.S. skyrocketed as people searched for companionship during the times of uncertainty. They are seen as part of the family and can mean as much to you as any human can. These pets can range from common dogs or cats to exotic spiders or reptiles. This is a list of the top 6 most common pets in the United States, according to Pethelpful.com:

  1. Dogs

The most commonly owned pet in the United States are dogs, which should come as no surprise to most. It is estimated that there are approximately 76 million pet dogs in the United States, and over 46 million households own one. Dogs are the most common pets because they are known as “man’s best friends” and are perfect companions and additions to the family.

  1. Cats

At number 2 are cats. Cats are in 31 million households in the United States and are loved for their cute and soft appearance as well as being playful and sociable. They are clean, live long lives and are quiet pets that are also low maintenance and are cheaper compared to dogs.

  1. Fish

In the United States, fish are number 3 as the most popular pets in the U.S., and 12% of households in the U.S. own one or more fish. They are easy pets if you don’t have the time or space for a common pet. Fish have also been known for reducing stress when you watch them swim in an aquarium. These are a perfect fun and exciting pets to look at as they can come in different colors, shapes and sizes.

  1. Birds

Birds are great pets for being low cost, and live long lives. They can provide social interaction, stress-relief and are good for mental health. Birds easily form close connections with their owners and are extremely loyal. They love being cuddled and are very easy to train!

  1. Reptiles

Reptiles are at number 5 on this list for their fun, playful qualities. This includes lizards, snakes, salamanders and other small reptilian animals. They are common in older age groups, are increasing in popularity and can be fun to take care of. Reptiles are also ranked number 1 for “specialty” pets.

  1. Rabbits

Although rabbits are sweet and fluffy animals, they are also very difficult to care for. Once you get past the initial training stages of bunnies, they make great companions and can provide a lot of comfort. They are affectionate and love to cuddle and spend time with their owners.

All of these amazing animals have unique characteristics and appearances that are clearly loved in the United States. Each of these 6 different pets have great qualities, and you can refer to this list when deciding what kind of pet would be best for you and your lifestyle!

Benefits of composting

By: Trump Vang

In our world today, trash is a substantial part of our lives. Just in the United States alone, according to Trashcansunlimited.com, there is 146.1 million tons of waste in landfills, which is equivalent to the weight of 24 Great Pyramids of Giza. It’s an enormous problem in our lives, as it continues to pollute and spread into our environments and systems.

There are a few ways that trash can be mitigated. You’ve most definitely heard of recycling before, which is the process of converting waste and garbage into new materials and objects. One other common method is composting.

What is Composting?

If you didn’t know, composting is the process of recycling organic matter into a nutrient-rich soil or mulch through decomposition. You may see it in your school or at a local dump but its ability to turn food waste into compost is unmatched and integral in diminishing waste.

What Can I Compost?

Just like recycling, you can compost at home too! Though it’s important to know what you can compost. Put simply, try to only compost fruit and vegetable scraps. This can be anything from fresh, cooked, or moldy. Alongside this, it also accounts for leaves, coffee grounds, and grass cuttings.

There are other things that you can compost, but it’s often not recommended to do so. These items include meat and dairy products, which can spoil and attract pests, as well as lawn trimmings which may contain pesticides.

How Can I Compost?

You can either place your compost at a drop off center, or you can compost yourself in a compost bin. To compost, there are four different things that you need to create, and you need a proper combination of these elements to create a good compost: nitrogen, carbon, air, and water.

To achieve these individual elements you need specific things: Greens for Nitrogen, Browns for Carbon, and Oxygen and Water. Often greens, such as grass clippings and food scraps have proper nitrogen for the mix. Browns such as dead leaves, twigs and paper can be added to achieve a proper amount of carbon. For those last two elements, it’s integral to keep proper aeration and moisture within the environment.

Placing all of the materials in a compost bin, you would always want 3 parts brown to 2 parts green to get a proper combination. Make sure to place your compost bin within a dry area for the best growth.

It can often take 2 weeks to a few months for the compost to be ready. When ready, you can use compost for your garden and properly give your plants a nutritious start in their soils.

Going out of your way to compost your waste can go a long way in the big scheme of things. If everyone just decided to limit their trash going into landfills, we all could have a healthier lifestyle on Earth, saving the planet one piece of trash at a time.

HOW TO MAKE CAMOUFLAGE PATTERNS USING ‘PHOTOPEA’

By: Hoaseng Thao

Ever wanted to make a camouflage pattern but don’t know how? Well this article is for you, because this article will go through the process of how to make different camouflage patterns using the free editing website, ‘Photopea’.

Before we get into the tutorial, I must explain what is needed for a camouflage pattern to work as a functional camouflage pattern; here are the two rules I’ve made to explain this:

  1. The pattern must be created for a specific (or varieties of) environment, i.e. Woodland, Desert, Tropical, or Arctic environments.
  2. Colors cannot be too bright or too saturated, military camouflage patterns are designed to deceive the eye, not entice them.

STARTING OFF WITH THE CLOUDS

STEP 1

Go to https://www.photopea.com/ and start off with a new project, usually I prefer using 2000 pixels for both height and width however you can change this if you want.

STEP 2

Go to your layers tab, which should be on the right side, and click on the sticky note symbol on the bottom to create a new layer. There should already be a layer when you start the project, named “Background”, and we’ll be using that layer for the background color of the camouflage by using the paint bucket too by pressing “g”.

STEP 3

Select your new layer and go to the “Filters” tab at the top. There go to the “Render” tab and click the “Clouds”. Repeat this process again but instead of clicking “Clouds” you click on “Difference Clouds” twice.

IMPORTANT NOTE

This is the part where I’ll split this tutorial into three sections on how to create different types of camouflage patterns. The first section will go over how to make what I call, traditional camouflage patterns, which consists of round and blobby shapes.

The second section will go over how to make what’s called “Digital Camouflage” which uses more pixelated shapes than rounded blobby shapes, and examples of digital camouflage patterns are the Canadian CADPAT, the American UCP, and the Estonian ESTDCU.

The third and final section will go over how to make Flecktarn like camouflage patterns. For those who don’t know, Flecktarn is the camouflage pattern used by the German military and is distinct for using spots scattered across the pattern.

TRADITIONAL CAMOUFLAGE

STEP 1

Select the layer that has the clouds filter and go back to the filters tab then to the “Blur” tab. There you will select the “Gaussian Blur”. When clicked you’ll be greeted with a window asking how intense you want the blur to be, with the more blur resulting in a more rounded and blobby shape while less blur will result in a more erratic blob.

STEP 2

Now with the selected layer, you go to “Image”, “Adjustments”, and finally “Threshold”. Upon clicking “Threshold”, you can choose how intense the threshold would have on the layer, with the higher the intensity leading to less blobs and vice versa.

So, in this example 160 is more intense than 121

STEP 3

Selecting the layer you now go to “Select” then click on “Color Range”, where you’ll see a window pop up with the options to select specific colors or areas that are bright or dark, but depending on what you want for your pattern, you can select any of the options.

STEP 4

After selecting the color, you can now press the delete (or if you don’t have a delete button, you can go to the “Edit” then click on “Clear”) to  remove the selected area. With this, you can now change the color using gradient map or adding a new layer and pressing alt click to enable clipping mask, which would allow you to paint over the layer.

STEP 5

Now repeat the previous steps, which should try to be in different sizes and should try to disrupt the other layers. Here are a few examples of camos that I’ve created while following the steps above.

DIGITAL CAMOUFLAGE

STEP 1

Select the layer, go to “Filter”, “Pixelate”, and then “Pointillize”. I usually use 25px when using pointillize but you can change this depending on what you want. From here, you press “alt+ctrl+T” to free transform the layer, then you can hold “shift” and drag the bottom of the layer till it snaps to the middle of the image.

STEP 2

Duplicate the layer with “ctrl+J”, then move it to the bottom before merging with the original layer by selecting both layers and do “ctrl+E” to merge layers. Now you can do “Gaussian Blur” and go to “Filter”, “Pixelate”, and “Mosaic”. From here you can change the size of the pixels to your liking.

STEP 3

Now use the “Threshold Edit” to change how many white or black pixels would appear on the screen which you can delete by using the color range selection, and finally you can copy steps 4 and 5 from the traditional camouflage pattern section to create a digital camouflage pattern.

FLECKTARN CAMOUFLAGE

STEP 1

Select the layer, go to “Filter”, “Pixelate”, and then “Pointillize” and from here you can choose the size of the spots seen on Flecktarn camouflage patterns and its many variants. Now go apply “Gaussian Blur” to the layer, and I recommend that you keep the “Gaussian Blur” below 12px to avoid merging all the spots together.

STEP 2

Now repeat step 1 and color in the layers, and you now get yourself a Flecktarn style camouflage pattern.

CONCLUSION

There are many other ways to create different types of camouflage patterns but these three are the most common found throughout the world, and I hope that this tutorial helps you when it comes to designing your own camouflage patterns.

Here is a link to the website if you haven’t clicked on it before: https://www.photopea.com/